Blender-Made Oatmeal Pancakes Instructions
These light and airy oatmeal pancakes present an excellent breakfast choice crafted with 100% blended rolled oats, removing the necessity for flour. Naturally gluten-free and rich in fiber, these pancakes are not just satisfying but also quick to whip up. The recipe calls for a blender to mix all ingredients, producing a smooth batter that cooks into a light and fluffy consistency similar to vanilla cake.
**Reasons to Adore This Recipe:**
– **100% Rolled Oats:** The absence of flour makes these pancakes inherently gluten-free.
– **Fiber-Rich:** Whole grain oats contribute to a fulfilling breakfast.
– **Blender Method:** Fewer dishes and simple cleanup.
– **Vanilla Cake Taste:** Delightfully sweet and fulfilling.
**Ingredients Required:**
– Old Fashioned rolled oats
– Greek yogurt
– Eggs
– Your choice of milk
– Salted butter (or melted coconut oil)
– Brown sugar (or maple syrup)
– Vanilla extract
– Baking powder & kosher salt
**Cooking Suggestions:**
– Use low to medium-low heat for consistent cooking.
– Flip pancakes when bubbles appear and begin to burst on the surface.
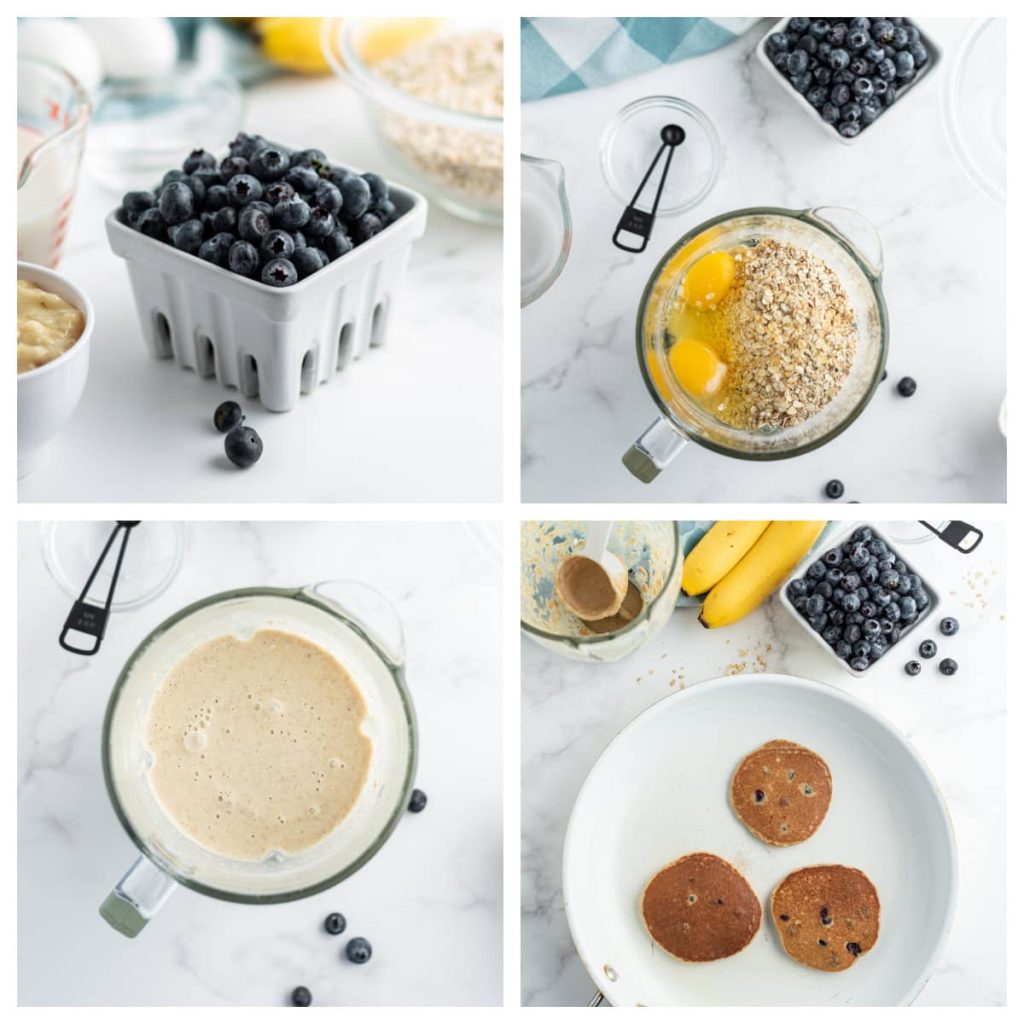
**Steps to Create Oatmeal Pancakes:**
1. **Blend the Batter:** Mix all ingredients in a blender until smooth.
2. **Let the Batter Rest:** Allow it to sit for 5 minutes to thicken.
3. **Heat the Skillet:** Lightly grease and warm over low to medium-low heat.
4. **Cook the Pancakes:** Pour batter into the skillet, cook until bubbles form, then flip.
5. **Adjust Batter Thickness:** Add milk if the batter becomes too thick.
**Variations & Add-Ins:**
– Consider adding blueberries, raspberries, lemons, pecans, spinach, bananas, or apples for some diversity.
**Topping Suggestions:**
– Enhance the taste with fresh fruits, nuts, or a drizzle of maple syrup.
**Storage & Freezing:**
– Keep leftovers in an airtight container for up to 4 days or freeze for as long as 3 months.
**Dietary Information:**
– Vegetarian and gluten-free. Explore alternative recipes for vegan options.
**Common Questions:**
– **Is It Healthier than Regular Pancakes?** Yes, owing to increased fiber and protein content.
– **Oat Substitutions:** Stick to rolled oats for optimal results.
– **Dairy-Free/Vegan Alternatives:** Opt for coconut oil and non-dairy milk/yogurt.
– **Waffle Version:** Check an oatmeal waffles recipe.
– **Make Ahead:** Batter can be refrigerated but might need tweaking before cooking.
These oatmeal pancakes serve as a flexible and wholesome breakfast option, great for meal prepping and suitable for a wide range of dietary preferences. Savor the delightful vanilla taste and the health advantages of whole grain oats!

Simple Recipe for Luxurious and Creamy Beef Stroganoff
# Simple Beef Stroganoff: A Household Favorite Recipe
Beef stroganoff is a timeless meal that brings coziness and solace to the dining experience. This straightforward recipe showcases tender pieces of beef enveloped in a rich, flavorful sauce with onions and mushrooms, making it a preferred choice for families. With basic ingredients and swift preparation, this dish is ideal for hectic weeknights.
## Reasons You’ll Adore This Household Favorite Recipe!
This beef stroganoff recipe assures that the **beef is exceedingly tender** and bursting with **taste**. The incorporation of mushrooms and onions not only elevates the flavor but also extends the meal, enhancing its cost-effectiveness. The mix of **basic ingredients**, **harmonious flavors**, and **swift preparation** distinguishes this recipe, making it a comforting and delightful mainstay in your kitchen.
## Optimal Cuts for Beef Stroganoff
Selecting the appropriate cut of beef is vital for a successful stroganoff. Here are some of the finest choices:
– **Ribeye**: Renowned for its tenderness and robust flavor due to intramuscular fat.
– **Sirloin**: An economical choice that remains tender and widely available.
– **Tenderloin/Filet**: The softest cut, although it may be pricier than necessary for this recipe.
– **Flank or Skirt Steak**: These cuts can be effective if sliced very thinly against the grain and not overcooked.
Leftover steak or beef tenderloin may also be utilized, making this recipe adaptable.
## What Composes Stroganoff Sauce?
The stroganoff sauce is a rich, creamy fusion of tastes, featuring savory mushrooms and a touch of tanginess from sour cream. Here are the main components:
– **Mushrooms**: Cremini mushrooms are favored, but any type like portobello or button can suffice.
– **Broth**: Beef broth or stock is crucial. If utilizing low-sodium broth, you may need to modify the salt content.
– **Sour Cream**: Essential for imparting creaminess; Greek yogurt can be used as a healthier substitute.
## Steps to Create Beef Stroganoff
Adhere to these straightforward steps to whip up a delectable beef stroganoff:
1. **Sear the Beef**: Pat the steak dry, slice it into strips or cubes, season with salt and pepper, and coat with flour. Brown in a skillet and set aside.
2. **Sauté Onions and Mushrooms**: In the identical skillet, sauté onions in butter, then introduce mushrooms and garlic until tender.
3. **Craft the Sauce**: Mix in the remaining flour, then add the broth, Worcestershire sauce, mustard, and thyme. Simmer until it reaches the desired thickness.
4. **Combine**: Bring the beef back into the skillet, heat thoroughly, and mix in the sour cream.
### Suggestions for Flawless Beef Stroganoff
– Sear the beef in smaller portions to prevent steaming.
– The beef may retain a slight pink hue inside as it will keep cooking.
– Deglaze the skillet for additional flavor by scraping up browned bits and introducing a splash of dry white wine.
– For a denser sauce, blend cornstarch with water and gradually incorporate it into the sauce.
## How to Preserve Beef Stroganoff
Store leftover beef stroganoff apart from noodles in a sealed container for up to 4 days. For extended storage, freeze portions without noodles for up to a month and defrost in the refrigerator. Reheat on the stovetop or in the microwave, adding a splash of milk if necessary.
## Ideal Accompaniments for Stroganoff
Beef stroganoff is traditionally served atop egg noodles, but it can also be paired with rice or mashed potatoes for a fulfilling meal.
Savor this simple beef stroganoff recipe that your family is sure to enjoy!

Steps to Make Iced Coffee
Alex & Sonja Overhiser: The Culinary Pair Behind A Couple Cooks
Introduce yourselves to Alex and Sonja Overhiser, the energetic husband-and-wife duo who have turned their love for cooking into a successful online culinary platform. As the creators of two celebrated cookbooks and the founders of the well-known website A Couple Cooks, they have been motivating home chefs since 2010 with their straightforward, seasonal recipes and useful cooking tips.
The Adventure Begins
Alex and Sonja’s culinary adventure originated from a mutual passion for food and an ambition to make cooking enjoyable and accessible for everyone. In 2010, they established A Couple Cooks as a venue to showcase their culinary creations and the happiness they found in cooking together. Over time, their website has expanded to include thousands of original recipes, each carefully developed and tested in their own kitchen.
Cookbooks and Cooking Philosophy
The couple’s commitment to preparing delicious, healthy meals resulted in the release of two cookbooks, which have been well-received by both reviewers and home cooks. Their culinary philosophy focuses on utilizing fresh, seasonal ingredients to create dishes that are not only healthy but also rich in flavor. Alex and Sonja advocate that cooking should be a delightful and fulfilling experience, and their recipes embody this belief by being approachable and straightforward.
Family and Culinary Arts
As engaged parents, Alex and Sonja are aware of the difficulties in preparing meals for a family. They have set out to create recipes that address the needs of families, providing meal planning suggestions and cooking advice that streamline the process of serving dinner. Their children play a crucial role in their culinary endeavors, frequently acting as taste testers for new dishes.
A Home Cook Community
Through A Couple Cooks, Alex and Sonja have fostered a lively community of home cooks who share their enthusiasm for food. Their website serves as a valuable resource, showcasing not just recipes but also cooking advice, meal planning resources, and peeks into the couple’s own culinary journeys. The Overhisers are dedicated to nurturing a love for cooking in others, motivating their audience to try new flavors and techniques in the kitchen.
Final Thoughts
Alex and Sonja Overhiser are more than mere recipe creators; they are culinary narrators who welcome others to embark on a journey of exploration and joy in the kitchen. Through their cookbooks and website, they persist in inspiring countless individuals to adopt the art of cooking and the happiness it adds to daily life.
Weekly Meal Schedule for March 2, 2026
### Discover Tasty New Recipes Every Day
In our fast-paced society, carving out time to whip up healthy and delectable meals can pose a challenge. Nevertheless, with the right tools, you can effortlessly unearth new recipes that will not only tantalize your taste buds but also harmonize with your hectic schedule. Enrolling in a daily recipe service can be a transformative experience for home chefs of any ability.
#### Advantages of Daily Recipe Subscriptions
1. **Diversity and Creativity**: Daily recipe subscriptions offer an extensive range of meal suggestions, from swift weeknight meals to lavish weekend banquets. This diversity keeps your dining experience thrilling and averts the dullness of repeatedly preparing the same dishes.
2. **Time Efficiency**: A daily recipe service allows you to cut down on meal prep time. Each day, you receive a new recipe featuring ingredients and cooking directions, enabling you to concentrate on cooking instead of planning.
3. **Nutritious Choices**: Numerous recipe subscriptions emphasize wholesome ingredients and well-balanced meals. This assists you in making healthier food choices and maintaining a nutritious diet without the inconvenience of searching for healthy recipes.
4. **Skill Enhancement**: Experimenting with new recipes can sharpen your culinary skills. You might learn novel techniques, discover new ingredients, and build confidence in the kitchen.
5. **Community Involvement**: Many recipe services cultivate a sense of community among their subscribers. You can exchange your cooking experiences, advice, and even pictures of your completed dishes with other cooking enthusiasts.
#### How to Enroll
Joining a daily recipe service is generally uncomplicated. You can go to a website, input your email address, and provide consent to receive recipes straight to your inbox. For instance, a simple form might request your email and permission to receive the newest recipes.
Once enrolled, you can anticipate receiving daily emails that include:
– A highlighted recipe with detailed instructions.
– Suggestions for ingredient swaps or variations.
– Nutritional details to assist you in making educated decisions.
#### Canceling Your Subscription
If you ever determine that the service isn’t to your liking, most subscriptions enable you to easily opt-out. Search for an “unsubscribe” link at the bottom of the emails you receive.
#### Stay Connected for More Ideas
Besides daily recipes, many services encourage you to connect with them on social media platforms like Facebook, Instagram, Pinterest, and TikTok. These platforms offer extra content, including cooking videos, tips, and opportunities for community interaction.
### Final Thoughts
Receiving delicious new recipes daily can revolutionize your cooking habits, rendering meal preparation fun and stress-free. By subscribing to a recipe service, you welcome a realm of culinary adventure that can improve your skills and inspire your meals. Embark on your journey today and relish the delight of cooking with fresh, exciting recipes sent directly to your inbox!

Healthy Mint Smoothie: A Wholesome Shamrock Shake
Alex & Sonja: The Culinary Pair Behind A Couple Cooks
Introducing Alex and Sonja Overhiser, the energetic pair who have turned their enthusiasm for cooking into a successful online presence. As the creators of two celebrated cookbooks, busy parents, and a real-life couple, Alex and Sonja have been showcasing their culinary adventure to the world since 2010 through their site, A Couple Cooks. Their goal is straightforward: to infuse homes with the joy of cooking through easy, seasonal recipes that everyone can partake in.
Established more than ten years ago, A Couple Cooks has evolved into a thorough resource for home chefs of all experience levels. The website boasts thousands of unique recipes, each thoughtfully designed and crafted by Alex and Sonja. From swift weeknight meals to intricate holiday banquets, their recipes aim to motivate and streamline the cooking experience. The couple’s commitment to excellence shines through in every dish, with every recipe carefully tested and photographed by them—often with their children’s taste-testing input.
In addition to recipes, Alex and Sonja provide a plethora of cooking tips and meal planning suggestions, facilitating families in weaving healthy, delightful meals into their everyday lives. Their friendly approach and sincere passion for food have garnered them a devoted audience, as they persist in motivating others to experience the joy of cooking together.
Whether you’re an experienced chef or new to the kitchen, Alex and Sonja’s A Couple Cooks is an invaluable resource for anyone eager to elevate their culinary abilities and relish the cooking experience. With their support, you’ll discover that preparing meals can be an enjoyable and fulfilling activity for the entire family.

Blender-Made Oatmeal Pancakes Instructions
These light and airy oatmeal pancakes present an excellent breakfast choice crafted with 100% blended rolled oats, removing the necessity for flour. Naturally gluten-free and rich in fiber, these pancakes are not just satisfying but also quick to whip up. The recipe calls for a blender to mix all ingredients, producing a smooth batter that cooks into a light and fluffy consistency similar to vanilla cake.
**Reasons to Adore This Recipe:**
– **100% Rolled Oats:** The absence of flour makes these pancakes inherently gluten-free.
– **Fiber-Rich:** Whole grain oats contribute to a fulfilling breakfast.
– **Blender Method:** Fewer dishes and simple cleanup.
– **Vanilla Cake Taste:** Delightfully sweet and fulfilling.
**Ingredients Required:**
– Old Fashioned rolled oats
– Greek yogurt
– Eggs
– Your choice of milk
– Salted butter (or melted coconut oil)
– Brown sugar (or maple syrup)
– Vanilla extract
– Baking powder & kosher salt
**Cooking Suggestions:**
– Use low to medium-low heat for consistent cooking.
– Flip pancakes when bubbles appear and begin to burst on the surface.
**Steps to Create Oatmeal Pancakes:**
1. **Blend the Batter:** Mix all ingredients in a blender until smooth.
2. **Let the Batter Rest:** Allow it to sit for 5 minutes to thicken.
3. **Heat the Skillet:** Lightly grease and warm over low to medium-low heat.
4. **Cook the Pancakes:** Pour batter into the skillet, cook until bubbles form, then flip.
5. **Adjust Batter Thickness:** Add milk if the batter becomes too thick.
**Variations & Add-Ins:**
– Consider adding blueberries, raspberries, lemons, pecans, spinach, bananas, or apples for some diversity.
**Topping Suggestions:**
– Enhance the taste with fresh fruits, nuts, or a drizzle of maple syrup.
**Storage & Freezing:**
– Keep leftovers in an airtight container for up to 4 days or freeze for as long as 3 months.
**Dietary Information:**
– Vegetarian and gluten-free. Explore alternative recipes for vegan options.
**Common Questions:**
– **Is It Healthier than Regular Pancakes?** Yes, owing to increased fiber and protein content.
– **Oat Substitutions:** Stick to rolled oats for optimal results.
– **Dairy-Free/Vegan Alternatives:** Opt for coconut oil and non-dairy milk/yogurt.
– **Waffle Version:** Check an oatmeal waffles recipe.
– **Make Ahead:** Batter can be refrigerated but might need tweaking before cooking.
These oatmeal pancakes serve as a flexible and wholesome breakfast option, great for meal prepping and suitable for a wide range of dietary preferences. Savor the delightful vanilla taste and the health advantages of whole grain oats!
Read More
Simple Recipe for Luxurious and Creamy Beef Stroganoff
# Simple Beef Stroganoff: A Household Favorite Recipe
Beef stroganoff is a timeless meal that brings coziness and solace to the dining experience. This straightforward recipe showcases tender pieces of beef enveloped in a rich, flavorful sauce with onions and mushrooms, making it a preferred choice for families. With basic ingredients and swift preparation, this dish is ideal for hectic weeknights.
## Reasons You’ll Adore This Household Favorite Recipe!
This beef stroganoff recipe assures that the **beef is exceedingly tender** and bursting with **taste**. The incorporation of mushrooms and onions not only elevates the flavor but also extends the meal, enhancing its cost-effectiveness. The mix of **basic ingredients**, **harmonious flavors**, and **swift preparation** distinguishes this recipe, making it a comforting and delightful mainstay in your kitchen.
## Optimal Cuts for Beef Stroganoff
Selecting the appropriate cut of beef is vital for a successful stroganoff. Here are some of the finest choices:
– **Ribeye**: Renowned for its tenderness and robust flavor due to intramuscular fat.
– **Sirloin**: An economical choice that remains tender and widely available.
– **Tenderloin/Filet**: The softest cut, although it may be pricier than necessary for this recipe.
– **Flank or Skirt Steak**: These cuts can be effective if sliced very thinly against the grain and not overcooked.
Leftover steak or beef tenderloin may also be utilized, making this recipe adaptable.
## What Composes Stroganoff Sauce?
The stroganoff sauce is a rich, creamy fusion of tastes, featuring savory mushrooms and a touch of tanginess from sour cream. Here are the main components:
– **Mushrooms**: Cremini mushrooms are favored, but any type like portobello or button can suffice.
– **Broth**: Beef broth or stock is crucial. If utilizing low-sodium broth, you may need to modify the salt content.
– **Sour Cream**: Essential for imparting creaminess; Greek yogurt can be used as a healthier substitute.
## Steps to Create Beef Stroganoff
Adhere to these straightforward steps to whip up a delectable beef stroganoff:
1. **Sear the Beef**: Pat the steak dry, slice it into strips or cubes, season with salt and pepper, and coat with flour. Brown in a skillet and set aside.
2. **Sauté Onions and Mushrooms**: In the identical skillet, sauté onions in butter, then introduce mushrooms and garlic until tender.
3. **Craft the Sauce**: Mix in the remaining flour, then add the broth, Worcestershire sauce, mustard, and thyme. Simmer until it reaches the desired thickness.
4. **Combine**: Bring the beef back into the skillet, heat thoroughly, and mix in the sour cream.
### Suggestions for Flawless Beef Stroganoff
– Sear the beef in smaller portions to prevent steaming.
– The beef may retain a slight pink hue inside as it will keep cooking.
– Deglaze the skillet for additional flavor by scraping up browned bits and introducing a splash of dry white wine.
– For a denser sauce, blend cornstarch with water and gradually incorporate it into the sauce.
## How to Preserve Beef Stroganoff
Store leftover beef stroganoff apart from noodles in a sealed container for up to 4 days. For extended storage, freeze portions without noodles for up to a month and defrost in the refrigerator. Reheat on the stovetop or in the microwave, adding a splash of milk if necessary.
## Ideal Accompaniments for Stroganoff
Beef stroganoff is traditionally served atop egg noodles, but it can also be paired with rice or mashed potatoes for a fulfilling meal.
Savor this simple beef stroganoff recipe that your family is sure to enjoy!
Read More
Steps to Make Iced Coffee
Alex & Sonja Overhiser: The Culinary Pair Behind A Couple Cooks
Introduce yourselves to Alex and Sonja Overhiser, the energetic husband-and-wife duo who have turned their love for cooking into a successful online culinary platform. As the creators of two celebrated cookbooks and the founders of the well-known website A Couple Cooks, they have been motivating home chefs since 2010 with their straightforward, seasonal recipes and useful cooking tips.
The Adventure Begins
Alex and Sonja’s culinary adventure originated from a mutual passion for food and an ambition to make cooking enjoyable and accessible for everyone. In 2010, they established A Couple Cooks as a venue to showcase their culinary creations and the happiness they found in cooking together. Over time, their website has expanded to include thousands of original recipes, each carefully developed and tested in their own kitchen.
Cookbooks and Cooking Philosophy
The couple’s commitment to preparing delicious, healthy meals resulted in the release of two cookbooks, which have been well-received by both reviewers and home cooks. Their culinary philosophy focuses on utilizing fresh, seasonal ingredients to create dishes that are not only healthy but also rich in flavor. Alex and Sonja advocate that cooking should be a delightful and fulfilling experience, and their recipes embody this belief by being approachable and straightforward.
Family and Culinary Arts
As engaged parents, Alex and Sonja are aware of the difficulties in preparing meals for a family. They have set out to create recipes that address the needs of families, providing meal planning suggestions and cooking advice that streamline the process of serving dinner. Their children play a crucial role in their culinary endeavors, frequently acting as taste testers for new dishes.
A Home Cook Community
Through A Couple Cooks, Alex and Sonja have fostered a lively community of home cooks who share their enthusiasm for food. Their website serves as a valuable resource, showcasing not just recipes but also cooking advice, meal planning resources, and peeks into the couple’s own culinary journeys. The Overhisers are dedicated to nurturing a love for cooking in others, motivating their audience to try new flavors and techniques in the kitchen.
Final Thoughts
Alex and Sonja Overhiser are more than mere recipe creators; they are culinary narrators who welcome others to embark on a journey of exploration and joy in the kitchen. Through their cookbooks and website, they persist in inspiring countless individuals to adopt the art of cooking and the happiness it adds to daily life.
Read More
Weekly Meal Schedule for March 2, 2026
### Discover Tasty New Recipes Every Day
In our fast-paced society, carving out time to whip up healthy and delectable meals can pose a challenge. Nevertheless, with the right tools, you can effortlessly unearth new recipes that will not only tantalize your taste buds but also harmonize with your hectic schedule. Enrolling in a daily recipe service can be a transformative experience for home chefs of any ability.
#### Advantages of Daily Recipe Subscriptions
1. **Diversity and Creativity**: Daily recipe subscriptions offer an extensive range of meal suggestions, from swift weeknight meals to lavish weekend banquets. This diversity keeps your dining experience thrilling and averts the dullness of repeatedly preparing the same dishes.
2. **Time Efficiency**: A daily recipe service allows you to cut down on meal prep time. Each day, you receive a new recipe featuring ingredients and cooking directions, enabling you to concentrate on cooking instead of planning.
3. **Nutritious Choices**: Numerous recipe subscriptions emphasize wholesome ingredients and well-balanced meals. This assists you in making healthier food choices and maintaining a nutritious diet without the inconvenience of searching for healthy recipes.
4. **Skill Enhancement**: Experimenting with new recipes can sharpen your culinary skills. You might learn novel techniques, discover new ingredients, and build confidence in the kitchen.
5. **Community Involvement**: Many recipe services cultivate a sense of community among their subscribers. You can exchange your cooking experiences, advice, and even pictures of your completed dishes with other cooking enthusiasts.
#### How to Enroll
Joining a daily recipe service is generally uncomplicated. You can go to a website, input your email address, and provide consent to receive recipes straight to your inbox. For instance, a simple form might request your email and permission to receive the newest recipes.
Once enrolled, you can anticipate receiving daily emails that include:
– A highlighted recipe with detailed instructions.
– Suggestions for ingredient swaps or variations.
– Nutritional details to assist you in making educated decisions.
#### Canceling Your Subscription
If you ever determine that the service isn’t to your liking, most subscriptions enable you to easily opt-out. Search for an “unsubscribe” link at the bottom of the emails you receive.
#### Stay Connected for More Ideas
Besides daily recipes, many services encourage you to connect with them on social media platforms like Facebook, Instagram, Pinterest, and TikTok. These platforms offer extra content, including cooking videos, tips, and opportunities for community interaction.
### Final Thoughts
Receiving delicious new recipes daily can revolutionize your cooking habits, rendering meal preparation fun and stress-free. By subscribing to a recipe service, you welcome a realm of culinary adventure that can improve your skills and inspire your meals. Embark on your journey today and relish the delight of cooking with fresh, exciting recipes sent directly to your inbox!
Read More
Healthy Mint Smoothie: A Wholesome Shamrock Shake
Alex & Sonja: The Culinary Pair Behind A Couple Cooks
Introducing Alex and Sonja Overhiser, the energetic pair who have turned their enthusiasm for cooking into a successful online presence. As the creators of two celebrated cookbooks, busy parents, and a real-life couple, Alex and Sonja have been showcasing their culinary adventure to the world since 2010 through their site, A Couple Cooks. Their goal is straightforward: to infuse homes with the joy of cooking through easy, seasonal recipes that everyone can partake in.
Established more than ten years ago, A Couple Cooks has evolved into a thorough resource for home chefs of all experience levels. The website boasts thousands of unique recipes, each thoughtfully designed and crafted by Alex and Sonja. From swift weeknight meals to intricate holiday banquets, their recipes aim to motivate and streamline the cooking experience. The couple’s commitment to excellence shines through in every dish, with every recipe carefully tested and photographed by them—often with their children’s taste-testing input.
In addition to recipes, Alex and Sonja provide a plethora of cooking tips and meal planning suggestions, facilitating families in weaving healthy, delightful meals into their everyday lives. Their friendly approach and sincere passion for food have garnered them a devoted audience, as they persist in motivating others to experience the joy of cooking together.
Whether you’re an experienced chef or new to the kitchen, Alex and Sonja’s A Couple Cooks is an invaluable resource for anyone eager to elevate their culinary abilities and relish the cooking experience. With their support, you’ll discover that preparing meals can be an enjoyable and fulfilling activity for the entire family.
Read More
Crispy Veggie Noodle Salad Recipe
### Simple Pasta Salad Recipe: Fresh, Tasty, and Quick
This simple pasta salad recipe is a charming mix of crunchy vegetables, zesty Italian dressing, and a dash of feta cheese. It’s ideal for potlucks, picnics, or as a prepared side dish for the week. With its lively colors and refreshing flavor, this pasta salad is bound to be a hit.
#### Taste Profile
The salad showcases a zesty Italian dressing that complements creamy feta beautifully, delivering a deliciously salty bite in every mouthful. The flavor combinations harmonize wonderfully when prepared in advance, resulting in a delightfully easy dish.
#### Serving Ideas
Prior to serving, quickly toss the pasta salad and add a little extra dressing if necessary. This salad travels well and tastes even better after a chill, making it a superb accompaniment to other potluck favorites like bean salad or coleslaw.
### Ingredients Required
– **Pasta:** Rotini is perfect as it clings well to the dressing, but ziti, penne, or bow ties are also excellent options. Cook the pasta al dente to keep it firm after chilling.
– **Veggies:** Choose cucumbers, tomatoes, and bell peppers for vibrancy and crunch. Dry the cucumbers and drain the juicy tomatoes to prevent a soggy salad.
– **Cheese:** A savory, crumbly cheese such as feta, parmesan, or blue cheese enhances the taste. Mozzarella pearls are a gentler alternative.
– **Dressing:** Italian dressing brings flavor (bottled or homemade). Use enough to generously coat the pasta, as it will soak up the dressing while chilling.
### Preferred Variations
– **Transform It into a Meal:** Incorporate diced ham, salami, shredded chicken, or chickpeas for added protein.
– **Keep It Mild:** Incorporate mozzarella pearls and soak red onion in cold water beforehand to tone down the sharpness.
– **Increase the Greens:** Add baby spinach just before serving for a fresh lift.
### Steps to Prepare Pasta Salad
1. **Cook the Pasta:** Boil the pasta in salted water until al dente, then drain and rinse under cold water to cool it down.
2. **Prepare the Vegetables:** Dice cucumbers, grape tomatoes, bell peppers, and red onions.
3. **Mix Ingredients:** In a large bowl, combine the cooked pasta, vegetables, Italian dressing, olives (if desired), and parsley. Toss thoroughly to coat.
4. **Season and Chill:** Season with salt, pepper, and gently mix in feta cheese. Refrigerate for a minimum of 2 hours to allow flavors to meld.
#### Tips for Optimal Results
– Ensure pasta is thoroughly drained after rinsing to avoid diluted dressing.
– Add feta at the end and stir gently to preserve its texture.
– Revitalize the salad with an extra tablespoon or two of dressing right before serving.
### How to Maintain Freshness
Store any leftovers in an airtight container in the refrigerator for up to 5 days. If preparing in advance, keep cucumbers and tomatoes separate to preserve their crunch. Toss with a little dressing right before serving to renew the flavors.
### Frequently Asked Questions
– **How long is pasta salad good in the fridge?** It lasts up to 5 days in an airtight container. Toss before serving and add a drizzle of dressing if it appears dry.
– **Can pasta salad be frozen?** Freezing is not advisable as the pasta and fresh vegetables can become soft and watery after defrosting.
– **What should be included in pasta salad?** Combine pasta, crunchy vegetables, dressing, and a salty cheese like feta, plus herbs. Add olives, pepperoncini, or proteins for a more filling dish.
– **What pairs well with pasta salad?** It goes nicely with burgers, sandwiches, ribs, and other potluck sides such as coleslaw or corn.
### Summary
This simple pasta salad is not only quick to make but also adaptable and tasty. Ideal for any event, it’s a dish that everyone will adore. Enjoy creating this fresh and flavorful salad that’s sure to captivate!

My Favorite Recipe for Chicken and Lentil Soup
**Title: A Warm Treat: My Favorite Recipe for Chicken and Lentil Soup**
As the seasons transition and the air becomes brisk, there’s nothing more satisfying than a hot, nourishing bowl of soup to soothe the spirit. Among the countless soup recipes, one shines as a treasured choice: Chicken and Lentil Soup. This meal is not only flavorful but also brimming with nutrients, making it an ideal dish for any time of year. Here’s how to whip up this tasty soup at home.
**Ingredients:**
– 1 tablespoon olive oil
– 1 medium onion, finely chopped
– 2 cloves garlic, minced
– 2 carrots, diced
– 2 celery stalks, diced
– 1 teaspoon ground cumin
– 1 teaspoon ground coriander
– 1/2 teaspoon turmeric
– 1/2 teaspoon smoked paprika
– Salt and pepper to taste
– 1 cup dried lentils, rinsed and drained
– 6 cups chicken broth
– 2 cups cooked chicken, shredded (ideally from a rotisserie chicken)
– 1 can (14.5 oz) diced tomatoes, undrained
– 1 bay leaf
– 1 tablespoon lemon juice
– Fresh parsley, chopped, for garnish
**Instructions:**
1. **Sauté the Aromatics:**
Start by heating the olive oil in a large pot over medium heat. Add the chopped onion and sauté until it turns translucent, approximately 5 minutes. Incorporate the minced garlic, diced carrots, and celery, cooking for an additional 3-4 minutes until the vegetables begin to soften.
2. **Spice it Up:**
Sprinkle in the ground cumin, coriander, turmeric, smoked paprika, salt, and pepper. Stir thoroughly to envelop the vegetables with the spices, unlocking their aromatic essence.
3. **Add Lentils and Broth:**
Pour in the rinsed lentils, then add the chicken broth. Stir to mix, bringing the concoction to a gentle boil. Lower the heat, cover the pot, and let it simmer for 20-25 minutes, or until the lentils become tender.
4. **Incorporate Chicken and Tomatoes:**
After the lentils are cooked, introduce the shredded chicken, diced tomatoes, and bay leaf into the pot. Mix well and keep simmering for another 10-15 minutes, allowing the flavors to combine beautifully.
5. **Final Touches:**
Remove the bay leaf and stir in the lemon juice, which adds a refreshing zest to the soup. Taste and modify the seasoning with extra salt and pepper if necessary.
6. **Serve and Enjoy:**
Serve the soup in bowls, garnishing with freshly chopped parsley. Enjoy it hot alongside crusty bread or a side salad for a complete meal.
**Nutritional Benefits:**
This Chicken and Lentil Soup is both comforting and nutritious. Lentils serve as a great source of protein, fiber, and important minerals, while chicken supplies lean protein. The inclusion of vegetables and spices boosts the nutritional value of the soup, making it a healthy option for lunch or dinner.
**Conclusion:**
This Chicken and Lentil Soup is a flexible dish that can be easily modified to match your preferences. Whether you seek a quick weeknight meal or a hearty dish to impress visitors, this recipe is sure to become a beloved part of your culinary collection. Relish the warmth and sustenance it provides at your table!
Read More
How to Create the Finest Homemade Cheese Pizza
This from-scratch cheese pizza recipe features a chewy crust, bubbling mozzarella, and a robust 5-minute sauce. It’s simple to prepare and surpasses takeout.
There’s a reason why cheese pizza remains timeless. The combination of a zesty tomato sauce and a generous helping of gooey, melted mozzarella delights everyone (especially children, of course!).
As a pizza enthusiast who’s honed various recipes from Margherita to taco pizza, I’ve prepared this cheese pizza more times than I can count. It resembles your favorite delivery cheese pizza but is about 1 million times superior. The sauce is particularly rich in tomato flavor, the cheese is exceptionally cheesy, and the crust boasts perfect chewiness. Curious about my tricks?
Why You’ll Adore This Recipe
– Chewy, crispy crust: The homemade pizza dough recipe I utilize has been perfected over a decade of home baking and has received plenty of positive reviews from readers.
– Perfect amount of cheesy: The blend of fresh mozzarella and shredded mozzarella creates the ultimate stretchy, melty layer.
– Kid-friendly crowd pleaser: Few would decline this irresistible option.
– Customizable: Begin with the classic version, then explore variations with different cheeses or crust styles.
What You’ll Require
For the Pizza
– Tipo 00 flour, bread flour, or all-purpose flour: In my view, the Italian Tipo 00 flour is essential for the finest pizza dough! However, bread flour yields a delightful, chewier crust. All-purpose flour is also acceptable: it may not be quite as fluffy and chewy but remains tasty.
– Yeast, olive oil, and salt: These are the finishing touches for the crust.
– Canned fire-roasted crushed tomatoes: Fire-roasted tomatoes provide a sweet, slightly smoky taste that ordinary crushed tomatoes lack.
– Garlic and dried oregano: Complements the sauce ingredients, along with olive oil.
– Fresh mozzarella cheese and shredded mozzarella cheese: The mix of gooey fresh mozzarella and stretchy shredded mozzarella creates a magical effect here.
– Parmesan cheese: Optional but advisable; a light dusting enhances salty richness.
Tools
– Pizza stone (highly recommended): Crucial for attaining a crispy crust in a home oven. Check out my guide on how to utilize a pizza stone.
– Pizza peel (recommended): This tool allows you to safely transfer the pizza onto the hot stone. I suggest this standard pizza peel as a great starting choice. For frequent pizza makers like me, this conveyor pizza peel simplifies things even more (though it’s somewhat pricier).
– Stand mixer: Using a stand mixer makes crafting the pizza dough a breeze, but you can also knead it manually.
How to Create This Cheese Pizza Recipe
Here are the fundamental steps for this pizza recipe:
1. Prepare the pizza dough. Follow my Best Pizza Dough recipe. This process takes about 15 minutes to mix and knead, followed by 45 minutes to rest. Alternatively, consult the variations below for simpler options.
2. Preheat. Position a pizza stone on the center rack and set the oven to 500°F. A preheat time of about 30 minutes is ideal.
3. Prepare the pizza sauce. Blend canned fire-roasted tomatoes with garlic, olive oil, dried oregano, and salt until smooth. For complete instructions, refer to my Easy Pizza Sauce recipe!
4. Stretch the dough. Dust a pizza peel with cornmeal or semolina. Shape the dough into a rough circle. Refer to my guide on How to Stretch Pizza Dough.
5. Assemble. Spread a thin layer of pizza sauce across the dough, then place pieces of fresh mozzarella and shredded mozzarella on top. Sprinkle with garlic powder, dried oregano, a dash of parmesan cheese, and a few pinches of kosher salt.
6. Bake. Use the peel to transfer the pizza directly onto the heated pizza stone. Bake for around 5 to 7 minutes, until the cheese melts and the crust turns golden brown. You can also use a pizza oven: check out my Ooni pizza guide for additional tips.
Tips for Flawless Pizza
Here are several common inquiries regarding homemade pizza:
– Adhere to the recipe instructions to achieve crust that’s neither soggy nor dense. Ensure the pizza stone is properly preheated, and apply only a thin layer of sauce to avoid a soggy crust. Use warm (not hot) water when mixing the dough, and allow it to rest for the full 45 minutes to guarantee it’s airy rather than dense.
– Utilize a pizza stone if possible, or make pan pizza. This pizza can be baked on a baking sheet: while it won’t be as crispy, it will still be flavorful. Alternatively, consider making Sheet Pan Pizza instead!
– Allow refrigerated dough to reach room temperature. Ensure refrigerated pizza dough comes to room temperature prior to stretching. Cold dough is rigid and challenging to manipulate. If it
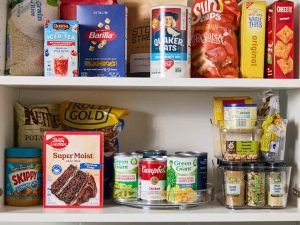
3 âGourmetâ Groceries That Came Straight Restaurant Kitchens

Restaurant quality, but at home.
READ MORE…

Omega-3-Packed Mediterranean Salmon: Simple Sheet Pan Dinner Recipe
**Omega-3-Loaded Mediterranean Salmon: Simple Sheet Pan Dinner Recipe**
The Mediterranean diet has been highly regarded for its heart-friendly advantages, with one of its key elements being omega-3-loaded salmon. This simple sheet pan dinner recipe merges the nutritional benefits of salmon with the lively tastes of Mediterranean cooking, making it an ideal selection for a nourishing and flavorful meal.
**Importance of Omega-3s**
Omega-3 fatty acids are vital fats that play an essential role in preserving heart wellness, alleviating inflammation, and enhancing brain function. Salmon is one of the top sources of these advantageous fats, establishing it as a central item in the Mediterranean diet. Consistent intake of omega-3s has been associated with a lower risk of heart ailments, enhanced mental well-being, and improved joint health.
**Ingredients**
– 4 salmon fillets (approximately 6 ounces each)
– 1 pint cherry tomatoes, halved
– 1 red onion, sliced thinly
– 1 zucchini, cut into half-moons
– 1 red bell pepper, sliced
– 1 lemon, cut into thin slices
– 3 tablespoons olive oil
– 2 teaspoons dried oregano
– 1 teaspoon garlic powder
– Salt and pepper to your preference
– Fresh parsley, chopped, for garnish
– Optional: Kalamata olives and feta cheese for an extra Mediterranean touch
**Instructions**
1. **Preheat the Oven**: Set your oven to 400°F (200°C).
2. **Prepare the Vegetables**: On a large sheet pan, arrange the cherry tomatoes, red onion, zucchini, and red bell pepper. Drizzle with 2 tablespoons of olive oil, and season with oregano, garlic powder, salt, and pepper. Toss to ensure the vegetables are evenly coated.
3. **Add the Salmon**: Place the salmon fillets among the vegetables on the sheet pan. Drizzle the remaining tablespoon of olive oil over the salmon, and season with salt and pepper. Lay lemon slices atop each fillet for enhanced flavor.
4. **Bake**: Put the sheet pan in the preheated oven and bake for 15-20 minutes, or until the salmon is fully cooked and flakes easily when tested with a fork. The vegetables should be tender and slightly caramelized.
5. **Garnish and Serve**: Take the sheet pan out of the oven. If preferred, add Kalamata olives and crumbled feta cheese on top. Garnish with fresh parsley prior to serving.
**Serving Suggestions**
This Mediterranean salmon sheet pan dinner pairs wonderfully with a side of quinoa, couscous, or a fresh green salad. For a complete Mediterranean experience, enjoy with a glass of crisp white wine.
**Conclusion**
This omega-3-loaded Mediterranean salmon sheet pan dinner is not only straightforward to make but also overflowing with flavor and nutrition. It’s an excellent illustration of how the Mediterranean diet can be both tasty and advantageous for your health. Relish this dish as part of a balanced diet to enjoy the numerous benefits of omega-3 fatty acids and the nourishing ingredients of the Mediterranean area.
Read More