21 Tasty Treats to Savor This Summer
What could be more enjoyable than a refreshing or fruity dessert on a warm summer day? Not much! Here’s a collection of my most beloved summer sweets, featuring traditional favorites like French clafoutis and exciting surprises like pineapple mint popsicles.
These dessert recipes are all fresh and straightforward to prepare, guaranteed to impress at a cookout or bring joy to your dining table. They’re lighter and healthier than many desserts, with several showcasing fresh berries and peaches (think fruity crisps, easy cakes, and frozen yogurt). Some recipes can be enhanced with a scoop of vanilla ice cream or a spoonful of whipped cream.
The days are lengthy and the climate is warm. Select a favorite from below, and let’s celebrate the season. Enjoy!
Clafoutis
This clafoutis recipe is simply outstanding! You can prepare it with berries (my preferred choice), cherries (my daughter’s favorite), or any of the fruity options mentioned in the post. The recipe makes one 10-inch clafoutis, yielding enough for 8 slices.
Lemon Posset
Lemon posset is a rich, citrusy dessert—the ideal petite treat. It presents a creamy texture and a harmonized lemon flavor that deliciously dances between tangy and sweet. Posset is incredibly simple to prepare! Set aside 3 hours for chilling. Recipe yields 8 to 9 small (2-ounce) servings.
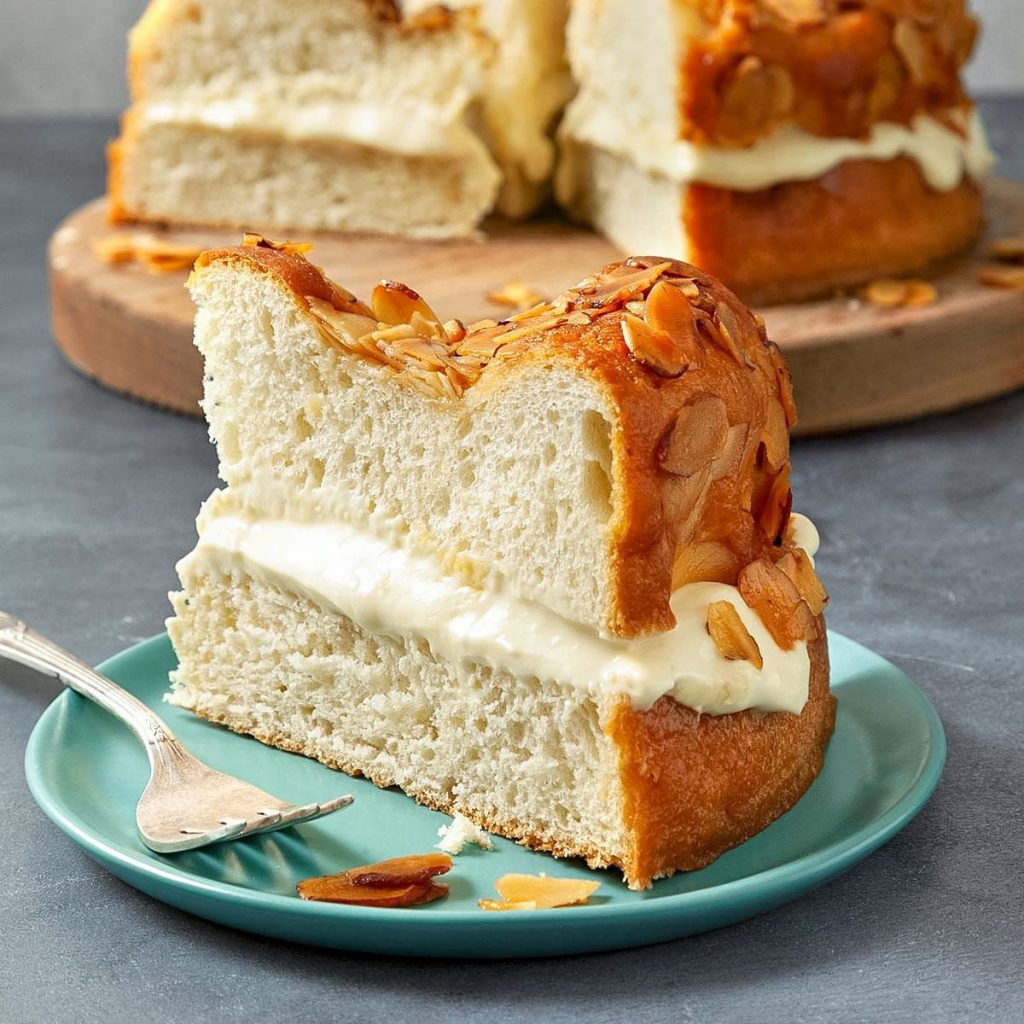
Gluten-Free Almond Cake with Berries on Top
This scrumptious gluten-free almond cake recipe is easy to create and naturally sweetened. Garnish with yogurt and fresh berries for a celebration-ready cake! Recipe yields one 9-inch cake, sufficient for 8 slices.
Peach Crisp (Gluten-Free)
This healthier peach crisp features succulent summer peaches and a delectable oat and almond topping, which happens to be gluten-free. Refer to recipe notes for adjustments suitable for special diets. Recipe yields 6 to 8 servings.
Thumbprint Cookies
These thumbprint cookies present classic shortbread taste with captivating jam centers. Almond flour renders them gluten-free and extra tasty! Recipe yields 22 to 24 small cookies.
Simple Blueberry Cake
Try making this easy blueberry cake recipe! This blueberry cake is soft and delightful, packed with blueberries, and not overly sweet. It’s also naturally sweetened and whole grain as described (check recipe notes for alternative flour suggestions). Recipe yields one 9-inch round cake, sufficient for 8 slices.
Strawberry Rhubarb Crisp
This straightforward crisp recipe is overflowing with sweet, juicy strawberries and tangy rhubarb. Crafted with honey, oats, and yogurt, this crisp is healthier than most. That said, please serve it with vanilla ice cream for dessert (or yogurt for breakfast)!
Easy Pineapple Mint Popsicles
Are you yearning for a cool summer delight? Create these effortless pineapple-mint popsicles! You’ll only need two ingredients to whip up these all-natural ice pops. Popsicle molds differ in capacity; this recipe results in 16 ounces total, so multiply as needed.
Mixed Berry Crisp (Gluten Free)
Prepare this delightful berry crisp using any combination of strawberries, blueberries, raspberries, or blackberries. It’s the perfect simple and fruity summer dessert. Recipe yields one 9-inch crisp, approximately 8 servings.
Pots de Crème
This foolproof pots de crème recipe quickly comes together in the blender and tastes fantastic. Make it for dessert, and freeze any leftovers! Yields 36 ounces, enough for anywhere between 36 petite 1-ounce servings and 9 generous 4-ounce servings.
Lemony Cheesecake Tart with Pistachio Crust
This cheesecake tart recipe is exceptional! It’s simple to make and tastes gourmet. The homemade pistachio-oat crust is also gluten-free.


7-Day Nutritious Meal Schedule for July 21-27
**7-Day Nutritious Meal Schedule for July 21-27**
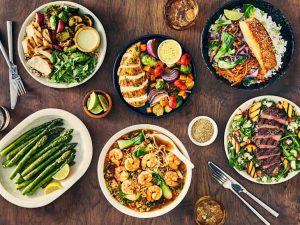
Eating healthily can be simple and enjoyable. With some foresight, you can savor a wide range of tasty meals that are both wholesome and fulfilling. Here’s a 7-day meal schedule to assist you in achieving your health objectives from July 21 to July 27.
**Day 1: Friday, July 21**
– **Breakfast:** Greek yogurt topped with assorted berries and a dash of granola.
– **Lunch:** Grilled chicken salad featuring mixed greens, cherry tomatoes, cucumber, and balsamic vinaigrette.
– **Dinner:** Baked salmon accompanied by quinoa and steamed broccoli.
– **Snack:** Sliced apple with almond butter.
**Day 2: Saturday, July 22**
– **Breakfast:** Oatmeal garnished with banana slices and a sprinkle of cinnamon.
– **Lunch:** Turkey and avocado wrap using whole wheat tortilla, served with carrot sticks.
– **Dinner:** Stir-fried tofu with assorted vegetables and brown rice.
– **Snack:** A handful of mixed nuts.
**Day 3: Sunday, July 23**
– **Breakfast:** Spinach smoothie blended with banana, almond milk, and a scoop of protein powder.
– **Lunch:** Lentil soup paired with whole-grain bread.
– **Dinner:** Grilled shrimp tacos topped with cabbage slaw and avocado.
– **Snack:** Greek yogurt drizzled with honey.
**Day 4: Monday, July 24**
– **Breakfast:** Whole grain toast spread with avocado and topped with a poached egg.
– **Lunch:** Quinoa salad mixed with chickpeas, cherry tomatoes, cucumber, and lemon dressing.
– **Dinner:** Baked chicken breast alongside sweet potato and green beans.
– **Snack:** Sliced bell peppers paired with hummus.
**Day 5: Tuesday, July 25**
– **Breakfast:** Chia seed pudding made with almond milk and fresh berries.
– **Lunch:** Bell peppers stuffed with spinach and feta.
– **Dinner:** Grilled steak served with roasted Brussels sprouts and mashed cauliflower.
– **Snack:** Rice cakes topped with peanut butter.
**Day 6: Wednesday, July 26**
– **Breakfast:** Scrambled eggs mixed with spinach and tomatoes.
– **Lunch:** Tuna salad on a bed of mixed greens with whole grain crackers.
– **Dinner:** Zucchini noodles served with marinara sauce and turkey meatballs.
– **Snack:** Cottage cheese served with pineapple chunks.
**Day 7: Thursday, July 27**
– **Breakfast:** Whole grain pancakes garnished with fresh strawberries.
– **Lunch:** Caprese salad featuring mozzarella, tomatoes, basil, and balsamic glaze.
– **Dinner:** Grilled vegetable skewers served with quinoa pilaf.
– **Snack:** A square of dark chocolate paired with a handful of almonds.
**Success Tips:**
– **Preparation:** Dedicate some time during the weekend to prepare ingredients, such as chopping vegetables, cooking grains, and marinating proteins, to expedite meal preparation throughout the week.
– **Hydration:** Maintain hydration by drinking plenty of water daily to support your metabolism.
– **Portion Control:** Be conscious of portion sizes to prevent overeating, even with healthy options.
– **Flexibility:** Feel free to interchange meals or snacks during the week to accommodate your tastes or schedule.
This meal schedule aims to strike a balance of macronutrients while offering a variety of flavors to keep your meals enjoyable and nutritious. Enjoy your journey toward healthy eating!

Coca-Cola Might Change Its Legendary Soda Recipe and People Are Not Happy

Prepare for new flavor from your favorite soda.
READ MORE…
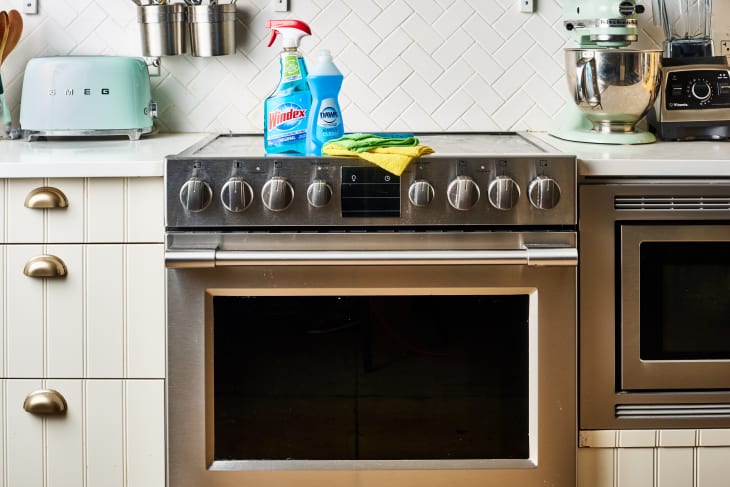
15 Brilliant Oven-Cleaning Hacks Youâll Wish You Knew Sooner

Cleaning your oven can be a hassle. This essential appliance is the workhorse of your kitchen, so it can easily accumulate rogue dinner debris, burnt-on gunk, and plenty of grease. You probably know staying on top of deep-cleaning your oven can help maintain it over the years (and prevent unwanted odors in your kitchen). But mustering the motivation to perform this cumbersome chore? Not that easy — until you learn these brilliant oven-cleaning hacks.
READ MORE…

21 Tasty Treats to Savor This Summer
What could be more enjoyable than a refreshing or fruity dessert on a warm summer day? Not much! Here’s a collection of my most beloved summer sweets, featuring traditional favorites like French clafoutis and exciting surprises like pineapple mint popsicles.
These dessert recipes are all fresh and straightforward to prepare, guaranteed to impress at a cookout or bring joy to your dining table. They’re lighter and healthier than many desserts, with several showcasing fresh berries and peaches (think fruity crisps, easy cakes, and frozen yogurt). Some recipes can be enhanced with a scoop of vanilla ice cream or a spoonful of whipped cream.
The days are lengthy and the climate is warm. Select a favorite from below, and let’s celebrate the season. Enjoy!
Clafoutis
This clafoutis recipe is simply outstanding! You can prepare it with berries (my preferred choice), cherries (my daughter’s favorite), or any of the fruity options mentioned in the post. The recipe makes one 10-inch clafoutis, yielding enough for 8 slices.
Lemon Posset
Lemon posset is a rich, citrusy dessert—the ideal petite treat. It presents a creamy texture and a harmonized lemon flavor that deliciously dances between tangy and sweet. Posset is incredibly simple to prepare! Set aside 3 hours for chilling. Recipe yields 8 to 9 small (2-ounce) servings.
Gluten-Free Almond Cake with Berries on Top
This scrumptious gluten-free almond cake recipe is easy to create and naturally sweetened. Garnish with yogurt and fresh berries for a celebration-ready cake! Recipe yields one 9-inch cake, sufficient for 8 slices.
Peach Crisp (Gluten-Free)
This healthier peach crisp features succulent summer peaches and a delectable oat and almond topping, which happens to be gluten-free. Refer to recipe notes for adjustments suitable for special diets. Recipe yields 6 to 8 servings.
Thumbprint Cookies
These thumbprint cookies present classic shortbread taste with captivating jam centers. Almond flour renders them gluten-free and extra tasty! Recipe yields 22 to 24 small cookies.
Simple Blueberry Cake
Try making this easy blueberry cake recipe! This blueberry cake is soft and delightful, packed with blueberries, and not overly sweet. It’s also naturally sweetened and whole grain as described (check recipe notes for alternative flour suggestions). Recipe yields one 9-inch round cake, sufficient for 8 slices.
Strawberry Rhubarb Crisp
This straightforward crisp recipe is overflowing with sweet, juicy strawberries and tangy rhubarb. Crafted with honey, oats, and yogurt, this crisp is healthier than most. That said, please serve it with vanilla ice cream for dessert (or yogurt for breakfast)!
Easy Pineapple Mint Popsicles
Are you yearning for a cool summer delight? Create these effortless pineapple-mint popsicles! You’ll only need two ingredients to whip up these all-natural ice pops. Popsicle molds differ in capacity; this recipe results in 16 ounces total, so multiply as needed.
Mixed Berry Crisp (Gluten Free)
Prepare this delightful berry crisp using any combination of strawberries, blueberries, raspberries, or blackberries. It’s the perfect simple and fruity summer dessert. Recipe yields one 9-inch crisp, approximately 8 servings.
Pots de Crème
This foolproof pots de crème recipe quickly comes together in the blender and tastes fantastic. Make it for dessert, and freeze any leftovers! Yields 36 ounces, enough for anywhere between 36 petite 1-ounce servings and 9 generous 4-ounce servings.
Lemony Cheesecake Tart with Pistachio Crust
This cheesecake tart recipe is exceptional! It’s simple to make and tastes gourmet. The homemade pistachio-oat crust is also gluten-free.
Read More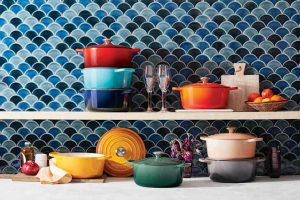

7-Day Nutritious Meal Schedule for July 21-27
**7-Day Nutritious Meal Schedule for July 21-27**
Eating healthily can be simple and enjoyable. With some foresight, you can savor a wide range of tasty meals that are both wholesome and fulfilling. Here’s a 7-day meal schedule to assist you in achieving your health objectives from July 21 to July 27.
**Day 1: Friday, July 21**
– **Breakfast:** Greek yogurt topped with assorted berries and a dash of granola.
– **Lunch:** Grilled chicken salad featuring mixed greens, cherry tomatoes, cucumber, and balsamic vinaigrette.
– **Dinner:** Baked salmon accompanied by quinoa and steamed broccoli.
– **Snack:** Sliced apple with almond butter.
**Day 2: Saturday, July 22**
– **Breakfast:** Oatmeal garnished with banana slices and a sprinkle of cinnamon.
– **Lunch:** Turkey and avocado wrap using whole wheat tortilla, served with carrot sticks.
– **Dinner:** Stir-fried tofu with assorted vegetables and brown rice.
– **Snack:** A handful of mixed nuts.
**Day 3: Sunday, July 23**
– **Breakfast:** Spinach smoothie blended with banana, almond milk, and a scoop of protein powder.
– **Lunch:** Lentil soup paired with whole-grain bread.
– **Dinner:** Grilled shrimp tacos topped with cabbage slaw and avocado.
– **Snack:** Greek yogurt drizzled with honey.
**Day 4: Monday, July 24**
– **Breakfast:** Whole grain toast spread with avocado and topped with a poached egg.
– **Lunch:** Quinoa salad mixed with chickpeas, cherry tomatoes, cucumber, and lemon dressing.
– **Dinner:** Baked chicken breast alongside sweet potato and green beans.
– **Snack:** Sliced bell peppers paired with hummus.
**Day 5: Tuesday, July 25**
– **Breakfast:** Chia seed pudding made with almond milk and fresh berries.
– **Lunch:** Bell peppers stuffed with spinach and feta.
– **Dinner:** Grilled steak served with roasted Brussels sprouts and mashed cauliflower.
– **Snack:** Rice cakes topped with peanut butter.
**Day 6: Wednesday, July 26**
– **Breakfast:** Scrambled eggs mixed with spinach and tomatoes.
– **Lunch:** Tuna salad on a bed of mixed greens with whole grain crackers.
– **Dinner:** Zucchini noodles served with marinara sauce and turkey meatballs.
– **Snack:** Cottage cheese served with pineapple chunks.
**Day 7: Thursday, July 27**
– **Breakfast:** Whole grain pancakes garnished with fresh strawberries.
– **Lunch:** Caprese salad featuring mozzarella, tomatoes, basil, and balsamic glaze.
– **Dinner:** Grilled vegetable skewers served with quinoa pilaf.
– **Snack:** A square of dark chocolate paired with a handful of almonds.
**Success Tips:**
– **Preparation:** Dedicate some time during the weekend to prepare ingredients, such as chopping vegetables, cooking grains, and marinating proteins, to expedite meal preparation throughout the week.
– **Hydration:** Maintain hydration by drinking plenty of water daily to support your metabolism.
– **Portion Control:** Be conscious of portion sizes to prevent overeating, even with healthy options.
– **Flexibility:** Feel free to interchange meals or snacks during the week to accommodate your tastes or schedule.
This meal schedule aims to strike a balance of macronutrients while offering a variety of flavors to keep your meals enjoyable and nutritious. Enjoy your journey toward healthy eating!
Read More
Coca-Cola Might Change Its Legendary Soda Recipe and People Are Not Happy
Prepare for new flavor from your favorite soda.
READ MORE…

15 Brilliant Oven-Cleaning Hacks Youâll Wish You Knew Sooner
Cleaning your oven can be a hassle. This essential appliance is the workhorse of your kitchen, so it can easily accumulate rogue dinner debris, burnt-on gunk, and plenty of grease. You probably know staying on top of deep-cleaning your oven can help maintain it over the years (and prevent unwanted odors in your kitchen). But mustering the motivation to perform this cumbersome chore? Not that easy — until you learn these brilliant oven-cleaning hacks.
READ MORE…
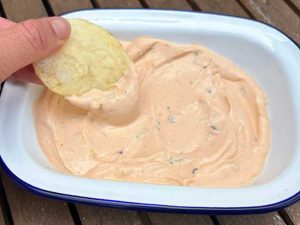
The Spicy Dip I Make on Repeat (Only 4 Ingredients!)

Your tacos will never be the same.
READ MORE…

The 5 Best All-Clad Wedding Gifts, According to Hundreds of Registries

I did not see #5 coming.
READ MORE…
My Favorite Meal Kit Service Is Offering a Free Caraway Pan (Yes, THAT Pan!)

Itâs a win-win.
READ MORE…
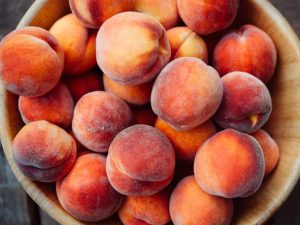
I Donât Squeeze or Sniff a Peach to Tell if Itâs Juicy â I Follow This Farmerâs Brilliant âTennis Ballâ Rule Instead

Plus, four more sweet tips to know.
READ MORE…

Katie Lee’s Summer Dinner Party Sounds So Delicious, We Wish We Were Invited

“You’ve got to have lots of alcohol.”
READ MORE…