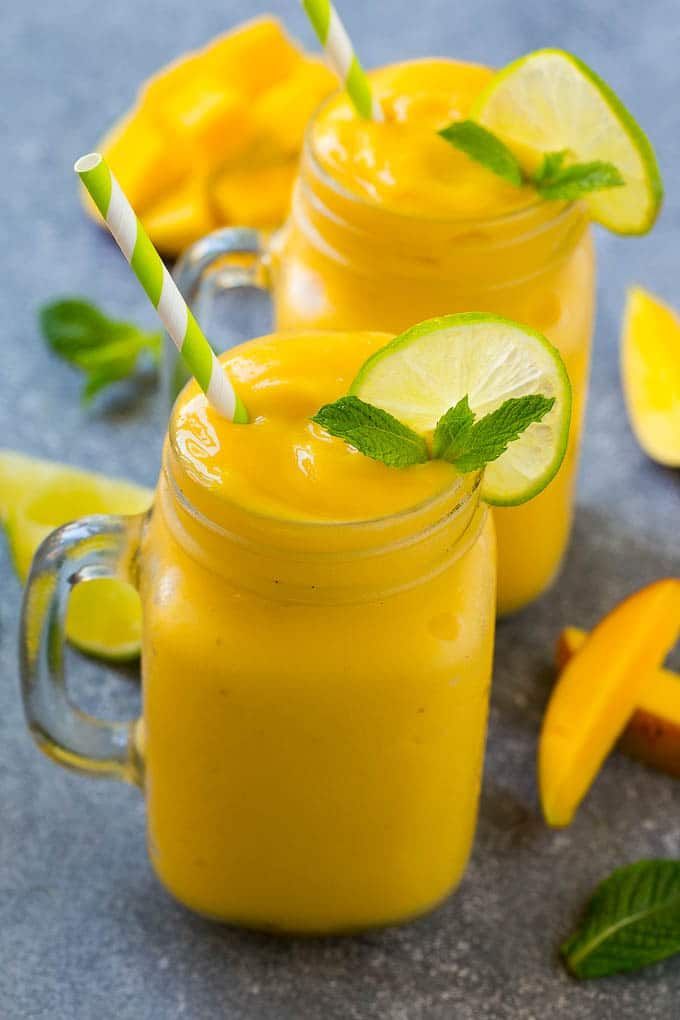
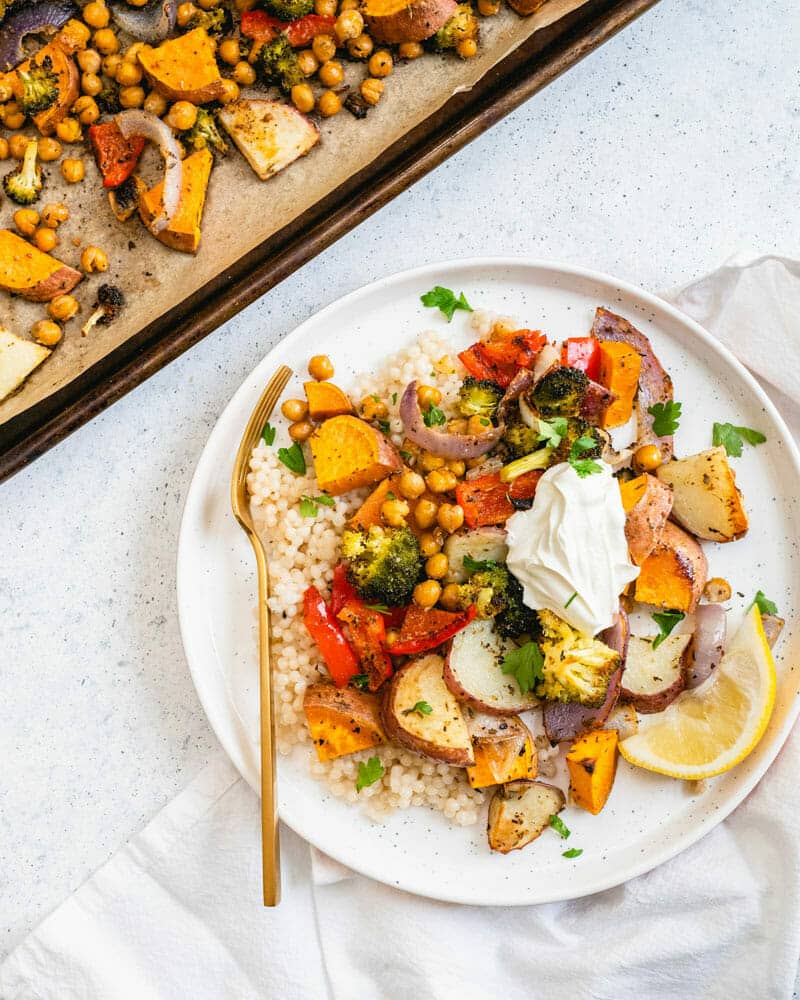
How to Prepare a Cool Mango Smoothie
**Elevating Your Smoothie with Greek Yogurt: A Protein Powerhouse**
Smoothies have emerged as a favorite among health aficionados and those with hectic schedules, providing a swift and tasty method to intake vital nutrients. One effective way to enhance the nutritional value of a smoothie is by adding Greek yogurt, a protein-packed ingredient that can elevate your drink into a more fulfilling and healthy meal.
**Protein Booster: Greek Yogurt**
Greek yogurt is celebrated for its substantial protein levels, making it a fantastic complement to smoothies for anyone aiming to boost their protein consumption. By swapping out ¼ to ½ cup of milk with Greek yogurt in your smoothie recipe, you can greatly increase the protein content. This change not only improves the nutritional quality but also adds to a creamier mouthfeel and a zesty flavor.
When you incorporate Greek yogurt, you may notice that your smoothie thickens more than you’d like. If this happens, just add a bit more water to reach your desired texture. This modification guarantees that your smoothie blends well while retaining its luxurious, creamy consistency.
**Storage Tips: Keeping Your Smoothie Fresh**
While smoothies are ideally consumed right away for the best flavor and texture, there are occasions when making them in advance is needed. Fortunately, this mango smoothie recipe stands up well over time. When stored correctly, it can remain fresh for 1 to 2 days in the fridge.
To keep your smoothie, transfer it into a sealed container or a mason jar with a securely fastened lid. This preserves its freshness and wards off any unwanted flavors. It’s essential to remember that some separation is normal during storage. Before drinking, give the smoothie a vigorous shake to mix the ingredients back together, restoring its original texture and taste.
By including Greek yogurt in your smoothie and adhering to these storage recommendations, you can savor a wholesome, protein-rich drink that effortlessly fits into your busy routine. Whether enjoyed right away or kept for later, this upgraded smoothie is guaranteed to delight your palate and meet your nutritional requirements.
A Compilation of 50 Healthy Recipes for Breakfast, Lunch, and Dinner
Alex & Sonja: The Culinary Pair Behind A Couple Cooks
Introducing Alex and Sonja Overhiser, the energetic pair who have transformed their love for cooking into a flourishing online community. As the creators of two celebrated cookbooks and the founders of the well-known website A Couple Cooks, they have been motivating home cooks since 2010 with their uncomplicated, seasonal recipes and contagious passion for the culinary arts.
Alex and Sonja’s foray into the realm of food blogging commenced with a mutual affection for cooking and a wish to unite people through delightful, nutritious meals. Their site, A Couple Cooks, stands as a testament to this aim, providing thousands of unique recipes, cooking advice, and meal planning inspiration that cater to busy families and culinary enthusiasts alike.
What distinguishes Alex and Sonja is their cooperative method to cooking. As a real-life couple, they grasp the joys and hurdles of preparing meals together, and they share this exclusive viewpoint with their audience. Each recipe on their platform is a collaborative effort, with Alex and Sonja both participating in the writing, photography, and testing stages. Their children also play an essential role, acting as the ultimate taste testers for their dishes.
The Overhisers’ devotion to simplicity and seasonality is apparent in their recipes, which highlight fresh, accessible ingredients and uncomplicated techniques. Whether you’re a beginner cook or an experienced chef, their inviting style makes it simple to whip up delectable dishes that honor the tastes of each season.
Besides their online activities, Alex and Sonja have penned two cookbooks that delve deeper into their culinary beliefs. These books provide readers with a more extensive exploration of their favorite recipes and cooking insights, offering inspiration for anyone aiming to enhance their home cooking experience.
As busy parents, Alex and Sonja comprehend the significance of meal planning and time management in the kitchen. They share practical suggestions and techniques for maximizing your time while still relishing the cooking experience. Their website is a wealth of resources for anyone wishing to optimize their meal prep without compromising on flavor or nutrition.
Through A Couple Cooks, Alex and Sonja have cultivated a lively community of food enthusiasts who share their love for cooking and eating well. Their commitment to quality, creativity, and family-oriented recipes has established them as a reliable source of inspiration for innumerable home cooks worldwide.
Whether you’re in search of a quick weeknight dinner suggestion or a stunning dish for a special event, Alex and Sonja Overhiser have you covered. With their expert advice and infectious enthusiasm, you’ll uncover the joy of cooking and the pleasure of sharing delicious meals with your loved ones.
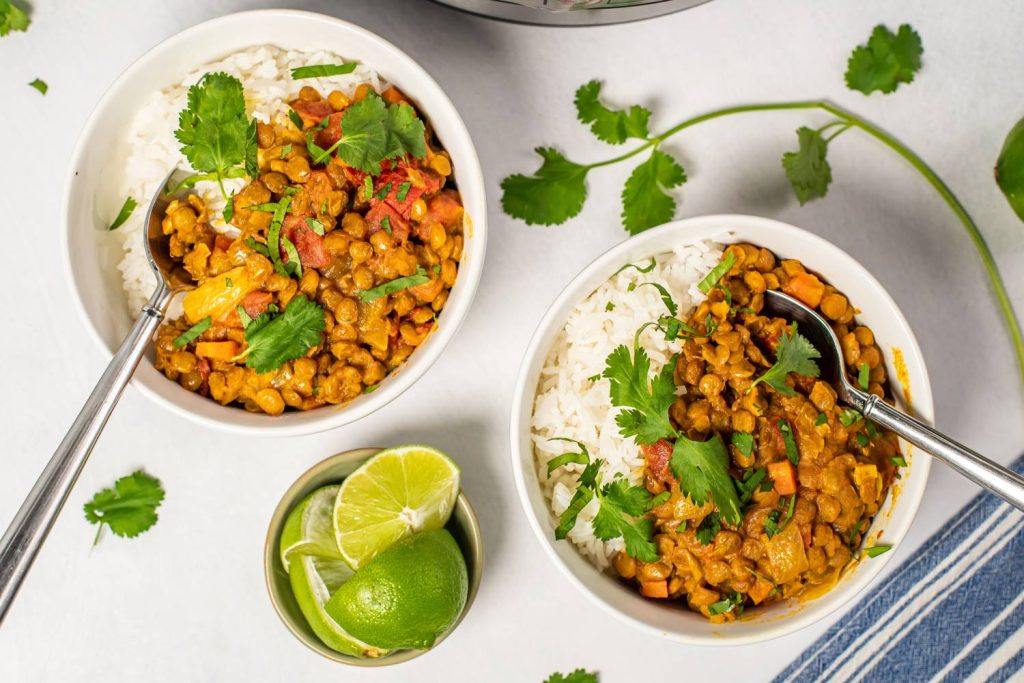
Coconut Lentil Curry Recipe: A Quick and Tasty Meal
Alex & Sonja: The Culinary Team Behind A Couple Cooks
Introducing Alex and Sonja Overhiser, the energetic pair behind the renowned culinary site, A Couple Cooks. As authors of two celebrated cookbooks, devoted parents, and a genuine couple united by a love for cooking, Alex and Sonja have been motivating home cooks globally since 2010. Their adventure commenced with a straightforward aim to express their affection for uncomplicated, seasonal recipes and the joy that comes from cooking together.
In 2010, Alex and Sonja established A Couple Cooks, a venue to share their culinary innovations with a broader audience. What began as a pastime swiftly transformed into a comprehensive guide for home chefs in search of delightful and attainable recipes. The website now features thousands of original recipes, all carefully created and photographed by the couple themselves. Each recipe reflects their dedication to quality and their enthusiasm for food.
A distinctive element of A Couple Cooks is the personal flair that Alex and Sonja infuse into their content. Every recipe is tested not only by the couple but also by their children, guaranteeing that the meals are family-friendly and appropriate for all ages. This hands-on method has garnered them a devoted readership that values the authenticity and dependability of their recipes.
In addition to recipes, A Couple Cooks provides an abundance of cooking advice and meal planning suggestions. Alex and Sonja recognize the struggles of juggling a hectic lifestyle with the wish to prepare nutritious, homemade meals. Their website offers practical tips and inspiration for anyone aiming to enhance their culinary skills and relish the experience of crafting meals from scratch.
Alex and Sonja’s commitment to their craft has been recognized. Their cookbooks have received acclaim for their innovation and accessibility, making them a significant addition to any home cook’s collection. Through their efforts, they keep encouraging others to embrace the joy of cooking and to appreciate the fulfillment that arises from sharing a meal with loved ones.
In a society where fast food and convenience frequently take priority, Alex and Sonja Overhiser remind us of the value of pausing, relishing each moment, and discovering joy in the simple act of cooking together. Their journey illustrates the strength of passion and collaboration, and their recipes celebrate the beauty and simplicity of homemade meals.
A Compilation of 30 Vegetarian Dishes for the Instant Pot
Alex & Sonja: The Culinary Pair Behind A Couple Cooks
Introducing Alex and Sonja Overhiser, the vibrant husband-and-wife duo who have turned their enthusiasm for cooking into a successful online culinary platform. As the creators of two well-received cookbooks and the founders of the well-loved website A Couple Cooks, Alex and Sonja have been motivating home chefs across the globe since 2010. Their adventure started with a straightforward wish to spread their affection for uncomplicated, seasonal recipes, which has now developed into a thorough resource offering thousands of unique recipes, cooking advice, and meal planning suggestions.
Alex and Sonja’s cooking philosophy is fundamentally anchored in the idea that meal preparation should be a pleasurable and attainable activity for all. Their recipes are crafted to be simple yet delicious, highlighting the importance of fresh, seasonal produce. This approach not only makes their meals accessible for chefs at any experience level but also promotes a healthier and more sustainable way of living.
The pair’s commitment to their art is clear in every facet of their endeavor. Each recipe featured on A Couple Cooks is carefully composed and exquisitely photographed by Alex and Sonja themselves, guaranteeing that their unique touch is reflected in every entry. Their dedication to excellence goes beyond the kitchen, as they thoroughly test each recipe with their own family, including their children, to ensure that the meals are not only tasty but also suitable for families.
Beyond their vast collection of recipes, Alex and Sonja provide a treasure trove of cooking advice and meal planning concepts to assist their audience in navigating the frequently daunting world of home cooking. Whether you’re a busy parent seeking quick dinners for the week or a culinary aficionado eager to try new flavors, A Couple Cooks offers the support and motivation needed to make cooking a delightful part of daily life.
Through their website, cookbooks, and engaging online presence, Alex and Sonja Overhiser have established a lively community of food enthusiasts who share their enthusiasm for cooking. Their narrative exemplifies the power of creativity, collaboration, and the simple pleasure of sharing a meal with those we care about. As they continue to discover new culinary paths, Alex and Sonja remain devoted to their goal of making cooking accessible, enjoyable, and fulfilling for everyone.
35 Tasty Dishes for a Meatless Monday
Alex & Sonja: The Culinary Pair Behind A Couple Cooks
Introducing Alex and Sonja Overhiser, the energetic pair who have transformed their love for cooking into a flourishing online community. As the creators of two bestselling cookbooks and the minds behind the beloved website A Couple Cooks, Alex and Sonja have been motivating home chefs since 2010 with their straightforward, seasonal recipes and contagious enthusiasm for the culinary world.
What started as a personal endeavor to record their culinary journeys has evolved into an extensive resource for food lovers globally. A Couple Cooks is more than just a recipe blog; it’s a celebration of the joys of cooking together as a couple and as a family. With thousands of unique recipes, valuable cooking advice, and useful meal planning concepts, the site serves both beginner cooks and experienced chefs seeking new inspiration.
Alex and Sonja’s cooking philosophy is grounded in simplicity and seasonality. They advocate that the finest meals come from fresh, wholesome ingredients that are easily accessible and quick to prepare. Their recipes are crafted to be user-friendly, motivating even the busiest parents to enjoy their time in the kitchen. From swift weeknight meals to extravagant weekend gatherings, A Couple Cooks presents a variety of dishes that accommodate diverse tastes and dietary needs.
Visual storytelling is an essential aspect of their narrative. Each recipe features breathtaking images that embody the spirit of the dish and the creation process. This meticulous attention to detail not only enhances the allure of the recipes but also aids readers in picturing the steps involved, making the cooking process more attainable and enjoyable.
As active parents, Alex and Sonja grasp the difficulties of juggling family obligations with culinary endeavors. Their recipes are tested on their own kids, confirming that they are not only flavorful but also suitable for families. This pragmatic approach has struck a chord with many of their followers, who value the couple’s genuineness and approachability.
Beyond just recipes, A Couple Cooks celebrates the communal experience of cooking. Alex and Sonja highlight the significance of cooking together, whether with a partner, family, or friends. They feel that the kitchen is a place of connection and imagination, where memories are created and relationships are deepened.
In addition to their digital footprint, Alex and Sonja have penned two cookbooks that delve deeper into their culinary beliefs. These books provide an in-depth look at their favorite recipes and cooking methods, offering readers a concrete resource to enrich their kitchen skills.
Through A Couple Cooks, Alex and Sonja Overhiser have established more than just a compilation of recipes; they’ve fostered a community of individuals who share a passion for cooking and a wish to unite people through food. Their journey serves as a reminder that cooking encompasses not only sustenance for the body but also nourishment for the spirit.

How to Prepare a Cool Mango Smoothie
**Elevating Your Smoothie with Greek Yogurt: A Protein Powerhouse**
Smoothies have emerged as a favorite among health aficionados and those with hectic schedules, providing a swift and tasty method to intake vital nutrients. One effective way to enhance the nutritional value of a smoothie is by adding Greek yogurt, a protein-packed ingredient that can elevate your drink into a more fulfilling and healthy meal.
**Protein Booster: Greek Yogurt**
Greek yogurt is celebrated for its substantial protein levels, making it a fantastic complement to smoothies for anyone aiming to boost their protein consumption. By swapping out ¼ to ½ cup of milk with Greek yogurt in your smoothie recipe, you can greatly increase the protein content. This change not only improves the nutritional quality but also adds to a creamier mouthfeel and a zesty flavor.
When you incorporate Greek yogurt, you may notice that your smoothie thickens more than you’d like. If this happens, just add a bit more water to reach your desired texture. This modification guarantees that your smoothie blends well while retaining its luxurious, creamy consistency.
**Storage Tips: Keeping Your Smoothie Fresh**
While smoothies are ideally consumed right away for the best flavor and texture, there are occasions when making them in advance is needed. Fortunately, this mango smoothie recipe stands up well over time. When stored correctly, it can remain fresh for 1 to 2 days in the fridge.
To keep your smoothie, transfer it into a sealed container or a mason jar with a securely fastened lid. This preserves its freshness and wards off any unwanted flavors. It’s essential to remember that some separation is normal during storage. Before drinking, give the smoothie a vigorous shake to mix the ingredients back together, restoring its original texture and taste.
By including Greek yogurt in your smoothie and adhering to these storage recommendations, you can savor a wholesome, protein-rich drink that effortlessly fits into your busy routine. Whether enjoyed right away or kept for later, this upgraded smoothie is guaranteed to delight your palate and meet your nutritional requirements.
Read More
A Compilation of 50 Healthy Recipes for Breakfast, Lunch, and Dinner
Alex & Sonja: The Culinary Pair Behind A Couple Cooks
Introducing Alex and Sonja Overhiser, the energetic pair who have transformed their love for cooking into a flourishing online community. As the creators of two celebrated cookbooks and the founders of the well-known website A Couple Cooks, they have been motivating home cooks since 2010 with their uncomplicated, seasonal recipes and contagious passion for the culinary arts.
Alex and Sonja’s foray into the realm of food blogging commenced with a mutual affection for cooking and a wish to unite people through delightful, nutritious meals. Their site, A Couple Cooks, stands as a testament to this aim, providing thousands of unique recipes, cooking advice, and meal planning inspiration that cater to busy families and culinary enthusiasts alike.
What distinguishes Alex and Sonja is their cooperative method to cooking. As a real-life couple, they grasp the joys and hurdles of preparing meals together, and they share this exclusive viewpoint with their audience. Each recipe on their platform is a collaborative effort, with Alex and Sonja both participating in the writing, photography, and testing stages. Their children also play an essential role, acting as the ultimate taste testers for their dishes.
The Overhisers’ devotion to simplicity and seasonality is apparent in their recipes, which highlight fresh, accessible ingredients and uncomplicated techniques. Whether you’re a beginner cook or an experienced chef, their inviting style makes it simple to whip up delectable dishes that honor the tastes of each season.
Besides their online activities, Alex and Sonja have penned two cookbooks that delve deeper into their culinary beliefs. These books provide readers with a more extensive exploration of their favorite recipes and cooking insights, offering inspiration for anyone aiming to enhance their home cooking experience.
As busy parents, Alex and Sonja comprehend the significance of meal planning and time management in the kitchen. They share practical suggestions and techniques for maximizing your time while still relishing the cooking experience. Their website is a wealth of resources for anyone wishing to optimize their meal prep without compromising on flavor or nutrition.
Through A Couple Cooks, Alex and Sonja have cultivated a lively community of food enthusiasts who share their love for cooking and eating well. Their commitment to quality, creativity, and family-oriented recipes has established them as a reliable source of inspiration for innumerable home cooks worldwide.
Whether you’re in search of a quick weeknight dinner suggestion or a stunning dish for a special event, Alex and Sonja Overhiser have you covered. With their expert advice and infectious enthusiasm, you’ll uncover the joy of cooking and the pleasure of sharing delicious meals with your loved ones.
Read More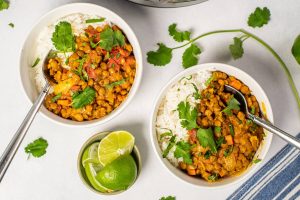
Coconut Lentil Curry Recipe: A Quick and Tasty Meal
Alex & Sonja: The Culinary Team Behind A Couple Cooks
Introducing Alex and Sonja Overhiser, the energetic pair behind the renowned culinary site, A Couple Cooks. As authors of two celebrated cookbooks, devoted parents, and a genuine couple united by a love for cooking, Alex and Sonja have been motivating home cooks globally since 2010. Their adventure commenced with a straightforward aim to express their affection for uncomplicated, seasonal recipes and the joy that comes from cooking together.
In 2010, Alex and Sonja established A Couple Cooks, a venue to share their culinary innovations with a broader audience. What began as a pastime swiftly transformed into a comprehensive guide for home chefs in search of delightful and attainable recipes. The website now features thousands of original recipes, all carefully created and photographed by the couple themselves. Each recipe reflects their dedication to quality and their enthusiasm for food.
A distinctive element of A Couple Cooks is the personal flair that Alex and Sonja infuse into their content. Every recipe is tested not only by the couple but also by their children, guaranteeing that the meals are family-friendly and appropriate for all ages. This hands-on method has garnered them a devoted readership that values the authenticity and dependability of their recipes.
In addition to recipes, A Couple Cooks provides an abundance of cooking advice and meal planning suggestions. Alex and Sonja recognize the struggles of juggling a hectic lifestyle with the wish to prepare nutritious, homemade meals. Their website offers practical tips and inspiration for anyone aiming to enhance their culinary skills and relish the experience of crafting meals from scratch.
Alex and Sonja’s commitment to their craft has been recognized. Their cookbooks have received acclaim for their innovation and accessibility, making them a significant addition to any home cook’s collection. Through their efforts, they keep encouraging others to embrace the joy of cooking and to appreciate the fulfillment that arises from sharing a meal with loved ones.
In a society where fast food and convenience frequently take priority, Alex and Sonja Overhiser remind us of the value of pausing, relishing each moment, and discovering joy in the simple act of cooking together. Their journey illustrates the strength of passion and collaboration, and their recipes celebrate the beauty and simplicity of homemade meals.
Read More
A Compilation of 30 Vegetarian Dishes for the Instant Pot
Alex & Sonja: The Culinary Pair Behind A Couple Cooks
Introducing Alex and Sonja Overhiser, the vibrant husband-and-wife duo who have turned their enthusiasm for cooking into a successful online culinary platform. As the creators of two well-received cookbooks and the founders of the well-loved website A Couple Cooks, Alex and Sonja have been motivating home chefs across the globe since 2010. Their adventure started with a straightforward wish to spread their affection for uncomplicated, seasonal recipes, which has now developed into a thorough resource offering thousands of unique recipes, cooking advice, and meal planning suggestions.
Alex and Sonja’s cooking philosophy is fundamentally anchored in the idea that meal preparation should be a pleasurable and attainable activity for all. Their recipes are crafted to be simple yet delicious, highlighting the importance of fresh, seasonal produce. This approach not only makes their meals accessible for chefs at any experience level but also promotes a healthier and more sustainable way of living.
The pair’s commitment to their art is clear in every facet of their endeavor. Each recipe featured on A Couple Cooks is carefully composed and exquisitely photographed by Alex and Sonja themselves, guaranteeing that their unique touch is reflected in every entry. Their dedication to excellence goes beyond the kitchen, as they thoroughly test each recipe with their own family, including their children, to ensure that the meals are not only tasty but also suitable for families.
Beyond their vast collection of recipes, Alex and Sonja provide a treasure trove of cooking advice and meal planning concepts to assist their audience in navigating the frequently daunting world of home cooking. Whether you’re a busy parent seeking quick dinners for the week or a culinary aficionado eager to try new flavors, A Couple Cooks offers the support and motivation needed to make cooking a delightful part of daily life.
Through their website, cookbooks, and engaging online presence, Alex and Sonja Overhiser have established a lively community of food enthusiasts who share their enthusiasm for cooking. Their narrative exemplifies the power of creativity, collaboration, and the simple pleasure of sharing a meal with those we care about. As they continue to discover new culinary paths, Alex and Sonja remain devoted to their goal of making cooking accessible, enjoyable, and fulfilling for everyone.
Read More
35 Tasty Dishes for a Meatless Monday
Alex & Sonja: The Culinary Pair Behind A Couple Cooks
Introducing Alex and Sonja Overhiser, the energetic pair who have transformed their love for cooking into a flourishing online community. As the creators of two bestselling cookbooks and the minds behind the beloved website A Couple Cooks, Alex and Sonja have been motivating home chefs since 2010 with their straightforward, seasonal recipes and contagious enthusiasm for the culinary world.
What started as a personal endeavor to record their culinary journeys has evolved into an extensive resource for food lovers globally. A Couple Cooks is more than just a recipe blog; it’s a celebration of the joys of cooking together as a couple and as a family. With thousands of unique recipes, valuable cooking advice, and useful meal planning concepts, the site serves both beginner cooks and experienced chefs seeking new inspiration.
Alex and Sonja’s cooking philosophy is grounded in simplicity and seasonality. They advocate that the finest meals come from fresh, wholesome ingredients that are easily accessible and quick to prepare. Their recipes are crafted to be user-friendly, motivating even the busiest parents to enjoy their time in the kitchen. From swift weeknight meals to extravagant weekend gatherings, A Couple Cooks presents a variety of dishes that accommodate diverse tastes and dietary needs.
Visual storytelling is an essential aspect of their narrative. Each recipe features breathtaking images that embody the spirit of the dish and the creation process. This meticulous attention to detail not only enhances the allure of the recipes but also aids readers in picturing the steps involved, making the cooking process more attainable and enjoyable.
As active parents, Alex and Sonja grasp the difficulties of juggling family obligations with culinary endeavors. Their recipes are tested on their own kids, confirming that they are not only flavorful but also suitable for families. This pragmatic approach has struck a chord with many of their followers, who value the couple’s genuineness and approachability.
Beyond just recipes, A Couple Cooks celebrates the communal experience of cooking. Alex and Sonja highlight the significance of cooking together, whether with a partner, family, or friends. They feel that the kitchen is a place of connection and imagination, where memories are created and relationships are deepened.
In addition to their digital footprint, Alex and Sonja have penned two cookbooks that delve deeper into their culinary beliefs. These books provide an in-depth look at their favorite recipes and cooking methods, offering readers a concrete resource to enrich their kitchen skills.
Through A Couple Cooks, Alex and Sonja Overhiser have established more than just a compilation of recipes; they’ve fostered a community of individuals who share a passion for cooking and a wish to unite people through food. Their journey serves as a reminder that cooking encompasses not only sustenance for the body but also nourishment for the spirit.
Read More
Weekly Meal Schedule for January 5, 2026
### Receive Tasty New Recipes Every Day
In our rapidly moving world, carving out time to whip up healthy and tasty meals can be tough. Yet, with the right tools, you can effortlessly uncover new recipes that not only conserve time but also excite your palate. Signing up for a daily recipe service can revolutionize your cooking habits and motivate you to experiment with new meals.
#### Reasons to Subscribe to Daily Recipes
1. **Diversity**: Daily recipe subscriptions provide a wide array of dishes, ranging from swift weeknight suppers to intricate weekend gatherings. This diversity keeps your meals interesting and averts the dullness of preparing the same meals over and over.
2. **Ease**: With recipes sent directly to your inbox, meal planning for the week becomes a breeze without the hassle of scouring for ideas. This ease is particularly advantageous for occupied individuals and families.
3. **Nutritious Choices**: A lot of recipe services emphasize healthy eating, offering nourishing recipes that accommodate diverse dietary needs, including vegetarian, vegan, gluten-free, and low-carb selections.
4. **Culinary Skills**: Experimenting with new recipes can boost your cooking abilities. You will discover fresh techniques, ingredients, and flavor pairings, turning you into a more adaptable chef.
5. **Community and Assistance**: Numerous recipe platforms cultivate a community of food enthusiasts. You can exchange your experiences, seek guidance, and connect with others who share your enthusiasm for cooking.
#### Steps to Get Started
To begin receiving tasty new recipes daily, think about subscribing to a trustworthy service. This usually requires completing a straightforward form with your email address and preferences. For instance, you may encounter a subscription form that appears as follows:
– **Email Address**: Input your email to get daily recipes.
– **GDPR Agreement**: Verify your consent to receive emails.
– **Other Preferences**: Some services let you indicate dietary restrictions or types of meals.
After subscribing, you can anticipate receiving a selection of recipes customized to your preferences, along with tips and culinary advice.
#### Unsubscribe Whenever
One of the fantastic advantages of these services is the flexibility they provide. If you find that the recipes aren’t aligning with your needs or if you merely wish to take a break, you can effortlessly unsubscribe at any moment through a link included in the emails.
#### Connect with Us on Social Media
Remain connected and motivated by following your preferred recipe platforms on social media. Engage with a community of food lovers, showcase your culinary masterpieces, and discover even more recipes. Platforms like Facebook, Instagram, Pinterest, and TikTok are superb venues to hunt for cooking inspiration and advice.
#### Final Thoughts
Enrolling in a daily recipe service is a splendid way to elevate your cooking adventure. With the ease of receiving new recipes straight to your inbox, you can delve into a realm of culinary opportunities that will make mealtime delightful and hassle-free. Embark on your journey towards delectable meals today!
Read More
Simple and Fast Hawaiian Sliders Recipe
# Ham and Cheese Sliders: A Tasty Game-Day Treat
Bursting with flavor and remarkably simple to prepare, ham and cheese sliders are an essential for game day. These scrumptious sandwiches showcase soft, subtly sweet rolls filled with savory ham, gooey cheese, and a buttery topping that bakes to a beautiful golden hue.
## Flavor Profile
Each bite of these sliders delivers a perfect balance of sweet, salty, buttery, and melty delight. The mix of soft rolls, oozy cheese, and a seasoned topping creates a delectable treat that is guaranteed to impress any gathering.
## Time-Saving Tips
To expedite the assembly process, consider using pre-sliced deli ham and pre-cut Swiss cheese. This allows you to create these tasty sandwiches in mere minutes!
## Ingredient Swaps
Feel free to get inventive with your sliders! You can experiment with various cheeses, alter the seasoning, or even opt for dinner rolls instead of Hawaiian rolls for a different taste experience.
## Perfect for Any Occasion
These sliders are not exclusively for game day; they are also ideal for weeknight meals or any event where you need to serve a group swiftly.
## Ingredient Notes
– **Hawaiian Rolls**: These rolls introduce a hint of sweetness, but any soft dinner roll will suffice. Keeping them intact simplifies assembly.
– **Deli Ham**: Choose thinly sliced black forest or honey deli ham. Shredded ham is also a tasty alternative.
– **Cheese**: While Swiss cheese complements ham beautifully, feel free to try cheddar, pepper jack, or other types.
– **Buttery Topping**: The topping is essential for flavor, so make sure not to skip it! You can replace onion powder with dried minced onion if necessary.
## Variations
– Substitute Swiss cheese with provolone, pepper jack, Havarti, or mozzarella.
– Use everything bagel seasoning in place of poppy seeds and onions for a distinct variation.
– Add thin slices of tomato or pickles after baking for a fresh, vibrant touch.
## How to Make Ham and Cheese Sliders
1. Preheat the oven to 350°F.
2. Slice the rolls horizontally and layer ham and cheese, then place the tops back on.
3. Combine the seasoned butter and brush it over the sliders.
4. Bake until heated, melty, and golden.
### Tips for Success
– Loosely cover with foil towards the end of baking if the tops brown too rapidly.
– Utilize a sharp serrated knife for cleanly slicing the sliders.
– For crunchier bottoms, pre-warm the baking dish before placing the sliders in it.
– Assemble in advance, cover well, and refrigerate for up to 24 hours before baking.
– You can freeze unbaked sliders and bake them directly from frozen, adding a few extra minutes to the cooking time.
## Storage & Leftovers
– Keep leftovers in an airtight container in the refrigerator for up to 4 days. Reheat at 325°F in the oven to prevent sogginess.
– Sliders can be frozen, whether baked or unbaked, for up to 6 months. Wrap them securely and thaw overnight in the fridge before reheating.
## Conclusion
Ham and cheese sliders are a flexible and tasty choice for any gathering. With their delightful taste and easy preparation, they are sure to become a staple in your recipe collection. Enjoy these sliders warm and watch them disappear swiftly at your next occasion!

Creamy Curry-Flavored Black Eyed Pea Soup
# Lush Curried Black Eyed Pea Soup
What’s that? You want a simple, tasty soup that nearly prepares itself and fulfills all of your greatest wishes!? Us too! While we can’t promise this Lush Curried Black Eyed Pea Soup will do just that, it certainly comes pretty close!
This soup is crafted with straightforward techniques in a single pot, featuring ingredients typically consumed on New Year’s Day to invite good fortune and abundance. We believe this will quickly become your go-to choice for everything from welcoming the new year to snow days, meal prep, weeknights & more!
## Culinary Inspiration
We’ve been ardent admirers of black eyed peas ever since we developed our Smoky Instant Pot Black Eyed Peas recipe. So when we noticed our remarkably inventive friend Todd (@turnipvegan) had made a Curry Black-Eyed Pea Bowl recipe, we couldn’t wait to try it! And it was a delight.
After a few modifications, we settled on our brothier, one-pot version, which has a more Indian-inspired flavor profile! Ready to learn how it’s done?
## Steps to Create Curried Black Eyed Pea Soup
This SIMPLE, creamy black eyed pea soup starts with sautéing onions, sweet potatoes, and red bell peppers, creating a naturally sweet foundation. Next, we incorporate minced garlic, freshly grated ginger, a generous helping of our go-to homemade curry powder, and red pepper flakes for some spice. We also add salt, establishing the base of a seriously flavorful soup!
Next, we enhance the flavor with coconut aminos and blend in a mixture of vegetable broth and coconut milk, which adds creaminess while staying lighter than traditional curry. Just a creamy, cozy soup!
Then it’s time to introduce the black eyed peas. One of the wonderful aspects of black eyed peas is that you can cook them from dried quickly, with no soaking needed! Of course, if you prefer, you can soak them (just reduce the broth slightly and anticipate a shorter cooking time). To speed up the process: You can opt for drained and rinsed canned black eyed peas!
After simmering until the black eyed peas reach tenderness and the broth flavors meld, your soup is set for the final enhancements: chopped kale for a touch of green goodness and fresh lime juice for brightness.
## Serving Suggestions for Black Eyed Pea Soup
This soup encompasses all the aspects of a fulfilling, one-pot meal: protein + fiber from the black eyed peas, complex carbohydrates from the sweet potato, and kale for added nutrients! However, it pairs beautifully with any of these additions:
– Rice
– Cornbread
– Toasted bread
We can’t wait for you to experience this soup! It’s:
– Creamy
– Brothy
– Naturally sweet (from veggies!)
– Simple to prepare
– Fulfilling
– Comforting
– Economical
– SO tasty!
This dish would be ideal for savoring on New Year’s Day or any chilly winter afternoon! It also freezes brilliantly, allowing you to prepare a batch and thaw it later when you require something ultra-quick + wholesome!
## Additional Creamy One-Pot Soups
If you give this recipe a try, let us know! Share your thoughts, rate it, and don’t forget to tag a picture @minimalistbaker on Instagram. Enjoy the soup season, friends!
### Recipe Information
**Prep Time:** 15 minutes
**Cook Time:** 45 minutes
**Total Time:** 1 hour
**Servings:** 4 (~2-cup servings)
**Course:** Main Course, Soup
**Cuisine:** Caribbean-Inspired, Gluten-Free, Indian-Inspired, Vegan, West African-Inspired
**Freezer Friendly:** 1 month
**Storage Duration:** 3-4 Days
### Ingredients List
– 1 Tbsp olive, coconut, or avocado oil
– 1 large onion (white or yellow), chopped
– 1 large white (Japanese) sweet potato, cubed into 1-inch pieces
– 1 large red bell pepper, chopped into 1/4-inch pieces
– 4 medium garlic cloves, minced
– 1 Tbsp freshly grated ginger
– 2 Tbsp homemade curry powder (or store-bought)
– 1/2 tsp crushed red pepper flakes
– 1/2-3/4 tsp sea salt (depending on the saltiness of your broth)
– 1 Tbsp coconut aminos
– 4 cups vegetable broth
– 1 (14-ounce) can light coconut milk
– 1 cup dried black eyed peas (or use two 15-ounce cans, drained and rinsed)
– 3 cups chopped kale, stems removed
– 1

German Chocolate Poke Cake Instructions
# German Chocolate Poke Cake Recipe
This German Chocolate Poke Cake recipe presents a rich and decadent dessert featuring a moist chocolate cake adorned with a velvety chocolate ganache and coconut pecan frosting. Enjoy this delightful treat that harmonizes the flavors of chocolate, coconut, and pecans, making it a preferred choice for any gathering.
## Recipe Ingredients
– **Mini Chocolate Chips**: Small gooey pockets of chocolate embedded within the cake.
– **Sour Cream**: The component that ensures the chocolate cake remains moist.
– **Sweetened Condensed Milk**: Ideal for soaking the cake and enhancing sweetness.
– **Butter**: Crucial for both the frosting and ganache.
– **Milk**: Utilized in the frosting and ganache.
– **Sugar**: Sweetens the frosting.
– **Egg Yolks**: Serves to thicken the frosting.
– **Vanilla Extract**: Infuses flavor into the frosting.
– **Chopped Pecans**: Adds texture to the frosting.
– **Shredded Coconut**: Contributes a chewy texture and flavor to the frosting.
– **Chopped Chocolate**: Necessary for creating the chocolate ganache.
– **Heavy Cream**: Used in making the ganache.
## How to Make German Chocolate Poke Cake
### Step 1:
Preheat your oven to 350 degrees Fahrenheit and coat a 9 x 13-inch cake pan with nonstick cooking spray. Set it aside.
### Step 2:
In a large mixing bowl or stand mixer, blend all the cake ingredients until well combined and smooth.
### Step 3:
Transfer the cake batter into the prepared pan and bake for 30-40 minutes until a toothpick inserted comes out clean.
### Step 4:
As the cake bakes, prepare the coconut pecan frosting. In a medium saucepan over medium heat, combine the butter, milk, sugar, egg yolks, and vanilla. Stir often until it thickens, which should take about 10-15 minutes.
### Step 5:
Take the frosting off the heat and place it into a bowl with the coconut and pecans. Mix well and let the frosting cool for 30-45 minutes, stirring occasionally.
### Step 6:
As soon as you take the cake out of the oven, create holes in the cake using the handle of a wooden spoon or a skewer.
### Step 7:
Drizzle the sweetened condensed milk over the cake, allowing it to seep into the holes while the cake cools.
### Step 8:
Once the cake has cooled, prepare the chocolate ganache. Place the chopped chocolate into a bowl and heat the heavy cream in a small saucepan over medium heat until it starts to boil around the edges.
### Step 9:
Pour the heated cream over the chocolate in the bowl and let it sit for 4 minutes. Then whisk until the ganache is smooth.
### Step 10:
Let the ganache rest and thicken for 5-10 minutes, then pour and evenly spread it over the cake.
### Step 11:
Refrigerate the cake for 10 minutes to let the ganache set.
### Step 12:
Spread the coconut pecan frosting over the cake.
### Step 13:
Finally, serve and savor!
## FAQs
**Is it necessary to use a Fudge Cake Mix for this recipe?**
I suggest using a fudge cake mix, but a German chocolate cake mix, devil’s food cake mix, or other chocolate boxed mixes will also work.
**What toppings can I add on this German Chocolate Cake?**
Additional toppings that could enhance the cake include a drizzle of chocolate or caramel sauce, a scoop of ice cream, or a dollop of whipped cream.
## Storage Information
Leftovers of this German chocolate cake can be stored in an airtight container at room temperature for 2 days, or in the refrigerator for 4-5 days. You can also freeze this cake for up to 2 months. To reheat, bring it to room temperature on its own or warm it slightly in the microwave.
Delight in this scrumptious German Chocolate Poke Cake and relish the rich flavors and textures that make it a cherished dessert!
Read More
Banana Cream Cake Recipe and Summary
**Discovering Global Tastes: The Wanderlust Kitchen**
In today’s rapid-paced environment, the pleasure of cooking and the excitement of travel can often seem like far-off aspirations. Nonetheless, Linda, the imaginative spirit behind The Wanderlust Kitchen, invites you to embark on a culinary adventure that surpasses boundaries. With a love for genuine food traditions and a talent for modern techniques, Linda assembles a collection of recipes that not only excite the palate but also evoke a sense of wanderlust.
### A Tribute to Authenticity
At The Wanderlust Kitchen, every recipe pays homage to the vibrant mosaic of global cuisines. Linda holds the belief that food serves as a potent vehicle for exploring diverse cultures and customs. Her recipes are carefully crafted to respect the authenticity of each dish while blending in contemporary ingredients and techniques. This method enables home cooks to replicate cherished international flavors in their own kitchens, merging tradition with innovation.
### Culinary Expeditions Await
A fundamental principle of The Wanderlust Kitchen is the promotion of culinary exploration. Linda encourages her readers to step outside their comfort zones and attempt new recipes that represent the varied culinary landscape of the globe. Whether it’s perfecting the craft of homemade pasta, experimenting with spices from the Middle East, or baking classic pastries from France, every recipe acts as a passport to a fresh destination.
### Assurance in the Kitchen
Linda recognizes that cooking can occasionally appear daunting, particularly when trying out unfamiliar recipes. That’s why The Wanderlust Kitchen focuses on fostering confidence through straightforward, step-by-step guidance and practical tips. Each recipe is crafted to be accessible, ensuring that both beginner cooks and experienced chefs can relish the experience of crafting delightful meals. With Linda’s support, readers can feel empowered to take chances in the kitchen and unleash their own culinary artistry.
### Journey Through Flavor
Beyond recipes, The Wanderlust Kitchen serves as a treasure trove of travel experiences. Linda shares her personal insights from various places, showcasing the local cuisine and cultural importance of each dish. These narratives not only enhance the cooking experience but also motivate readers to discover new locations and flavors. The concept is simple: as you cook through various recipes, you can also travel vicariously through Linda’s stories, igniting a desire to visit those destinations in person.
### Enjoy Your Meal! Safe Travels!
The Wanderlust Kitchen transcends being merely a recipe blog; it is a celebration of cuisine, culture, and the joy of discovery. Linda’s friendly and welcoming approach encourages everyone to embrace the adventure of both cooking and traveling. So, whether you’re eager to enhance your dinner routine or envisioning your next travel spot, The Wanderlust Kitchen is the ideal companion for your culinary voyage. Immerse yourself, explore, and let your taste buds guide you!
Read More